Guide | MobiPOS > Online Booking > Waitlist
New Waitlist
For walk in customer, you can create a waitlist for them if there is no table available currently.
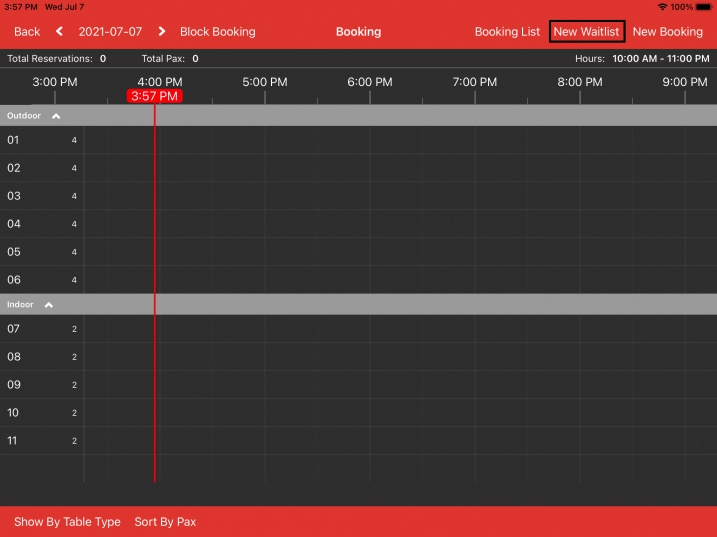
Click on New Waitlist located at the right top.
Proceed to select the party size and the estimated waiting time for this waitlist.
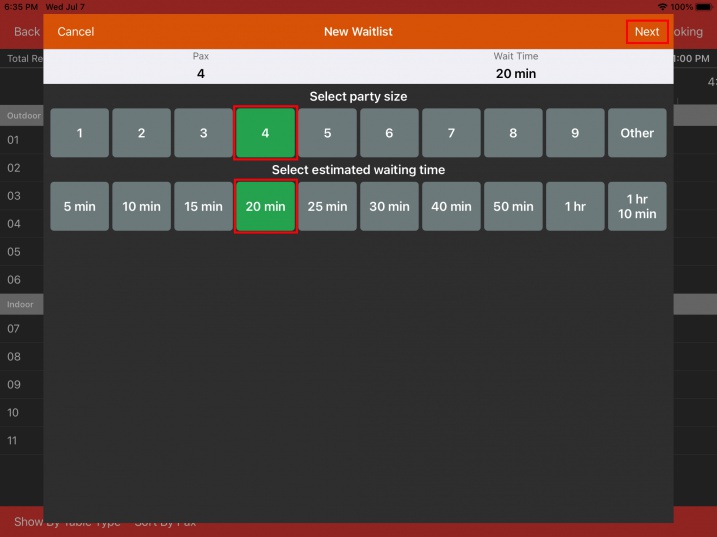
Click Next.
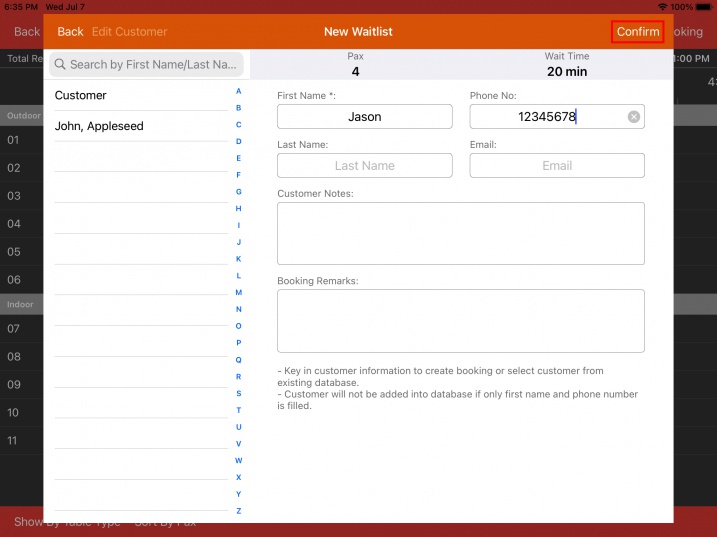
Key in customer necessary information and click Confirm.
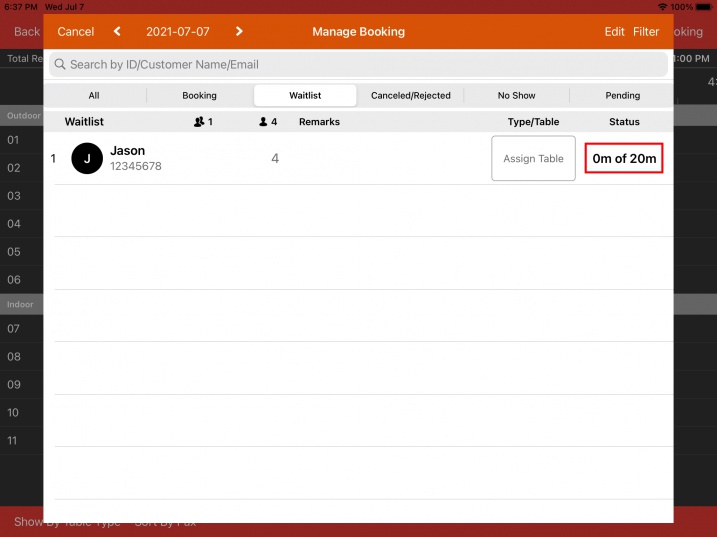
Upon creating the waitlist, you will be directed to Manage Booking.
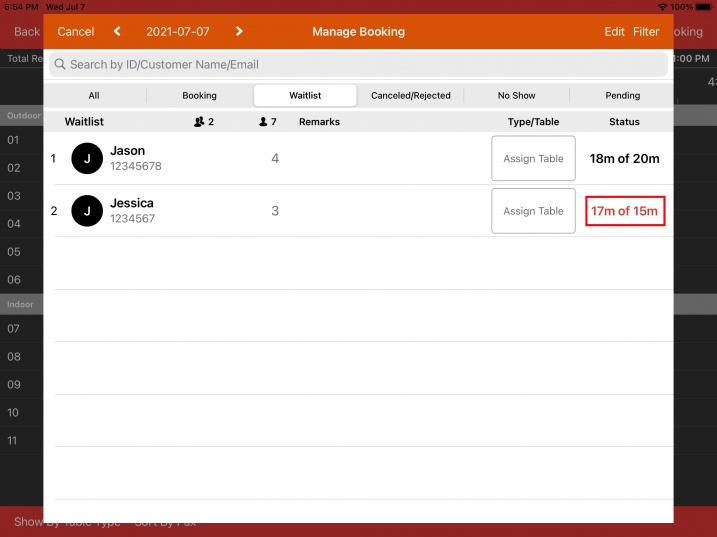
Here you will see the list of waitlist created.
In the status section, you will be able to see how long they've been on the waitlist compared to the given estimated waiting time.
If they've been waiting longer than the estimated time, the status will turn into red color.
Seating a Waitlist
To seat a waitlist, simply select a table for it.
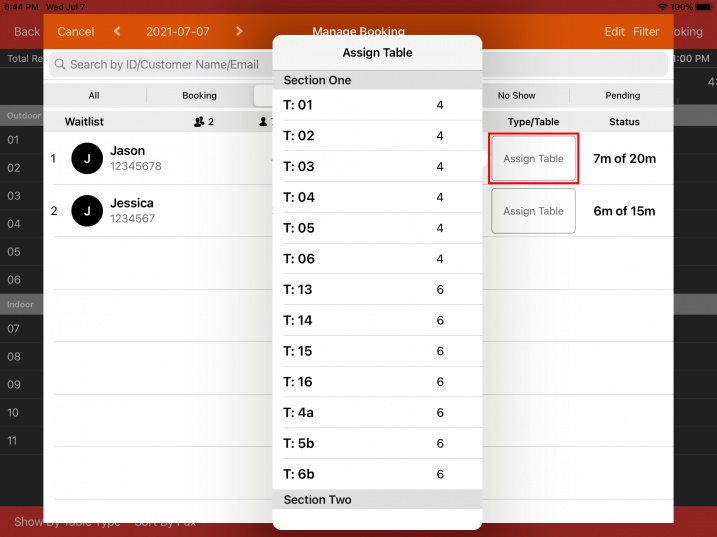
Number displayed on the right of the table is the maximum pax that the table support.
Assigning table to waitlist will not affect the table status in the POS, as you still need to start a transaction for them on that table.
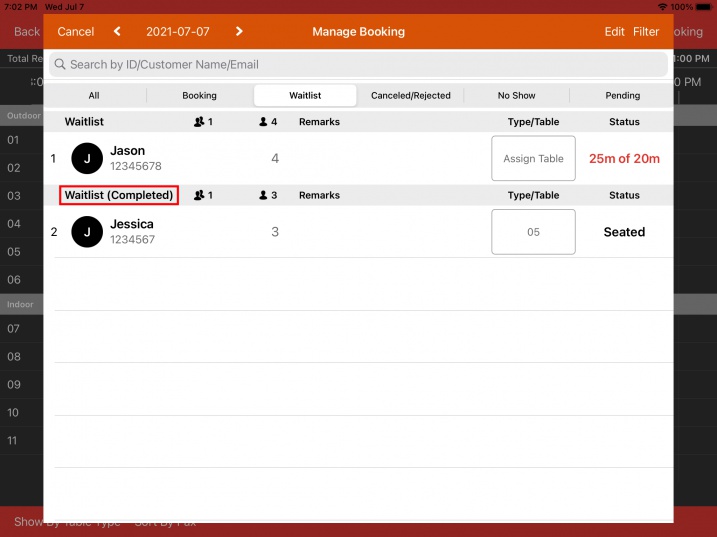
Upon seating the waitlist, it will be moved to the completed category as shown below.
Status will be changed to Seated
Modifying Waitlist
To modify waitlist, click on the waitlist row.
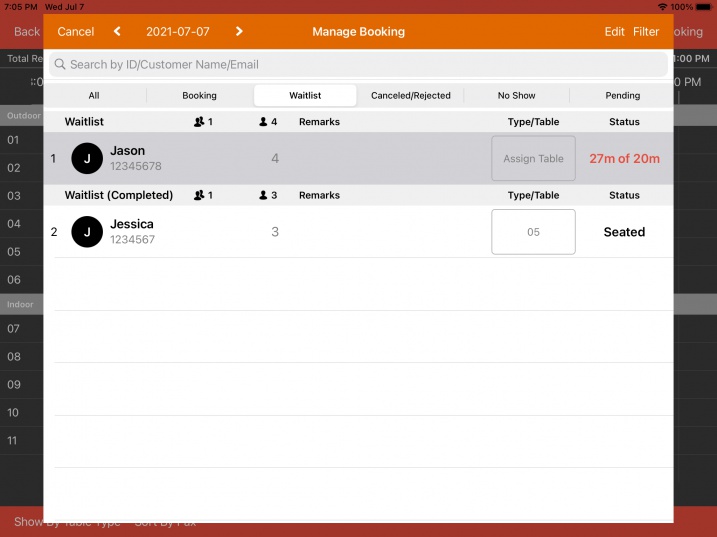
Click on the waitlist details on top to make changes to the party size or wait time.
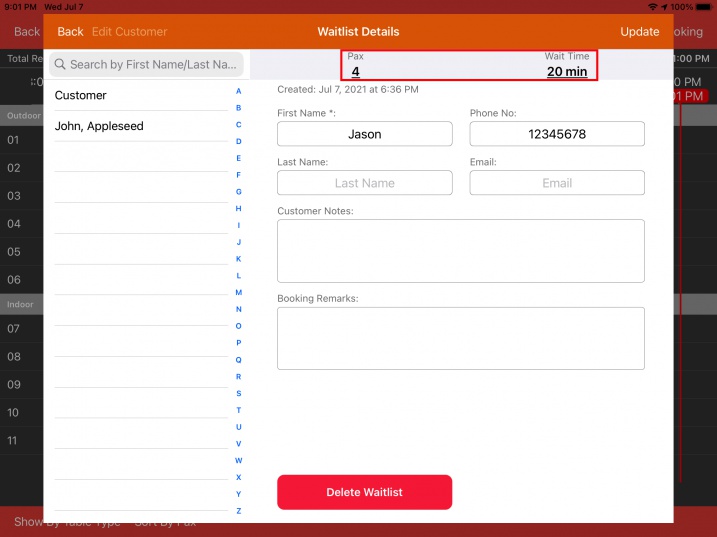
Proceed to change the party size or estimated waiting time.
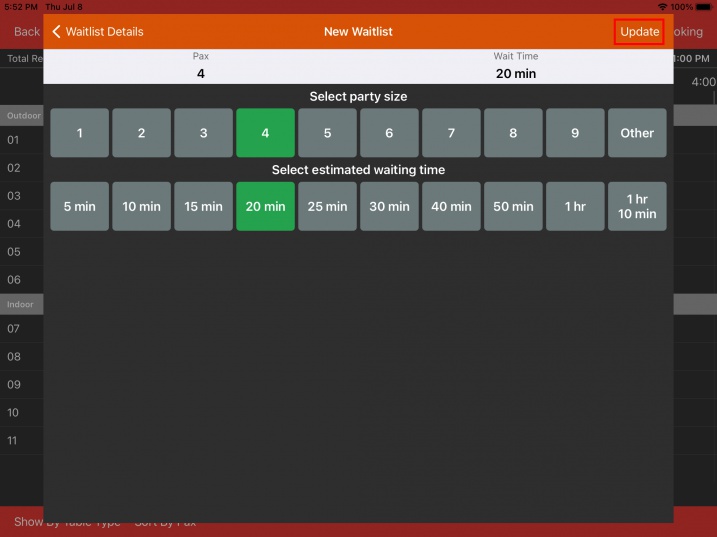
Click on Update to make the changes.