Guide | MobiPOS > CloudSync > Inventory Management > Stock Transfer
Stock Transfer
Stock transfer is the movement of inventory items between different branches.
This feature can only be used when you have at least two or more branches.
To transfer inventory between different branches, follow the steps below.
To do that, proceed to MobiPOS CloudSync and log in to your account.
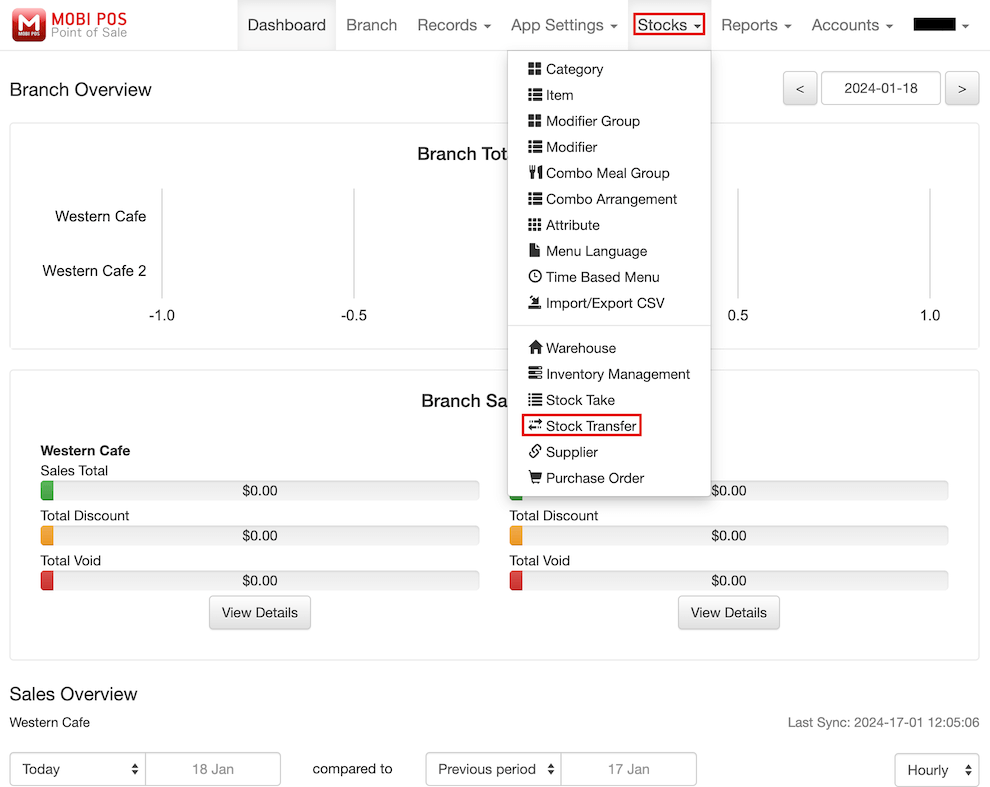
Then, click on Stocks at the top navigation bar and select Stock Transfer from the drop-down list.
Before starting a new stock transfer, please ensure that you have sufficient inventory in the branch you want to move.
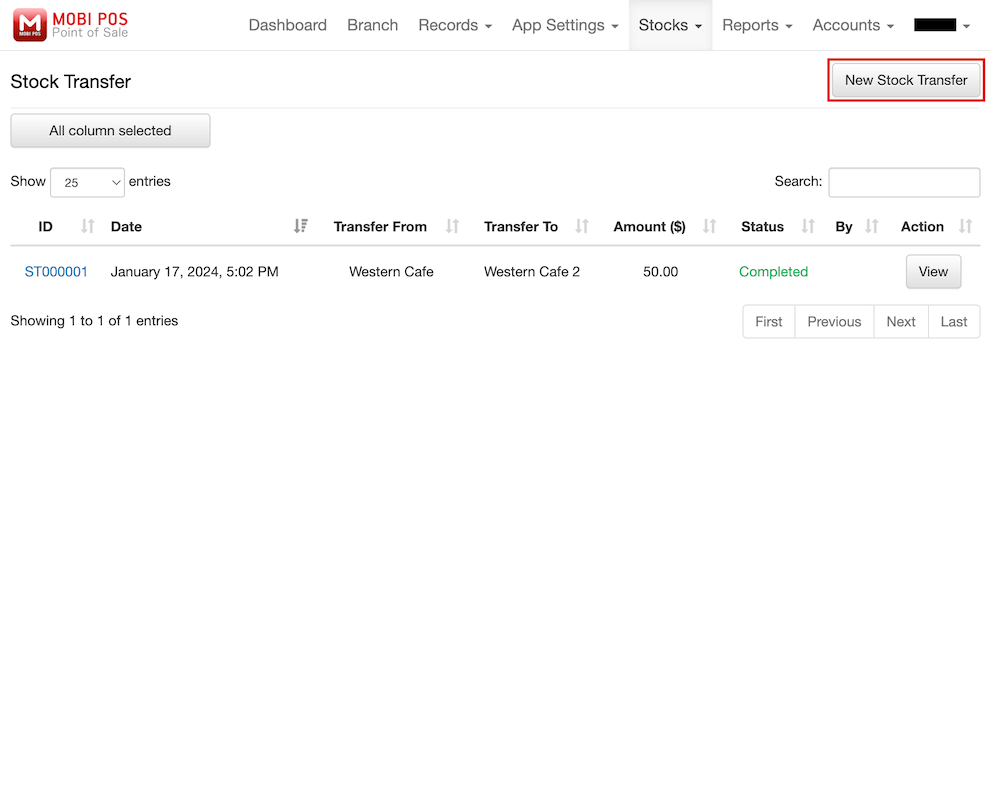
After confirming you have enough inventory, click on New Stock Transfer to begin the process.
First, select the branch you want to move from and the branch you want to move to.
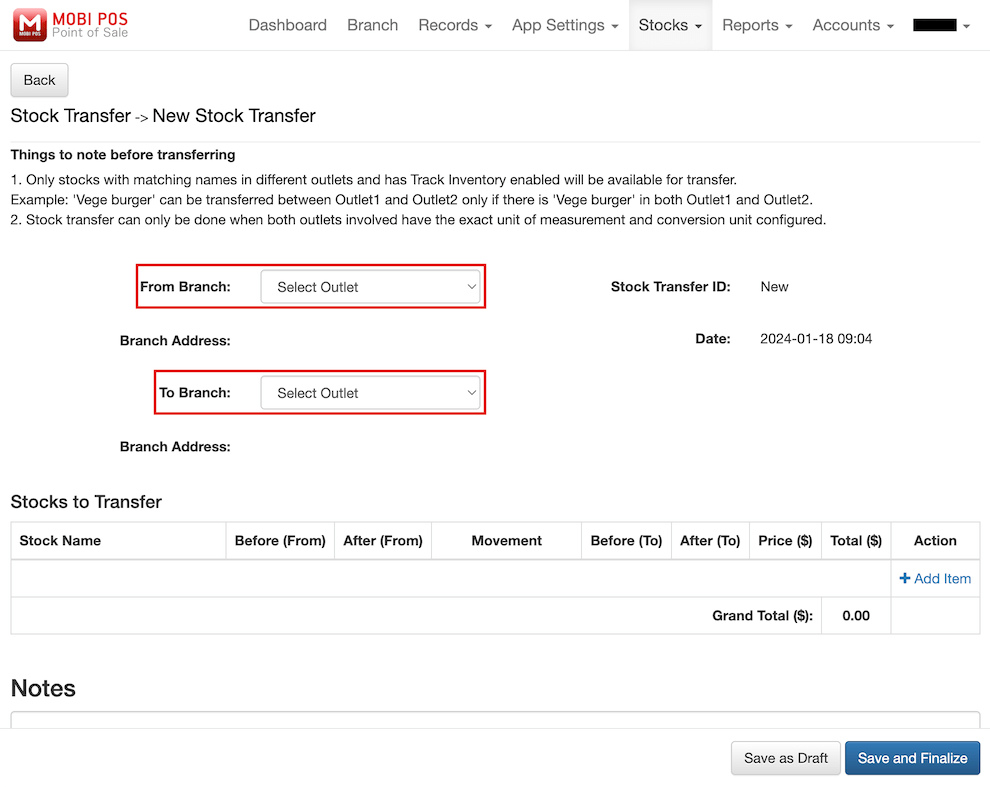
In this example, we will be transferring stocks from Western Cafe to Western Cafe 2.
Then, click on Add Item.
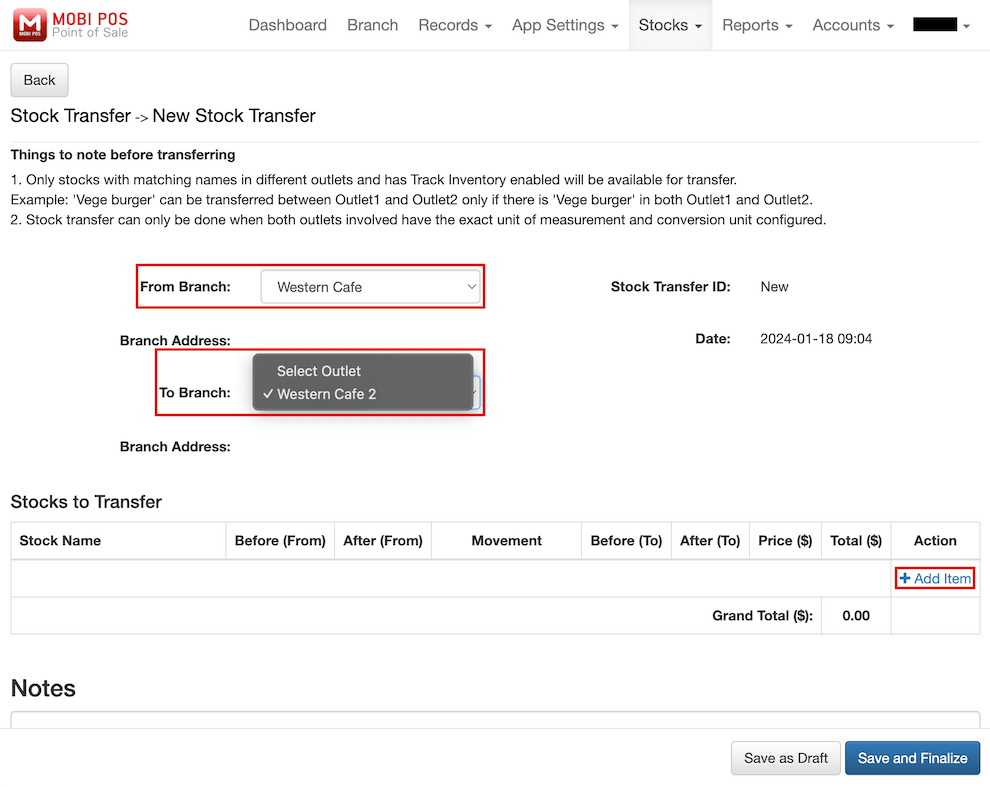
Now, select the stock you wish to transfer.
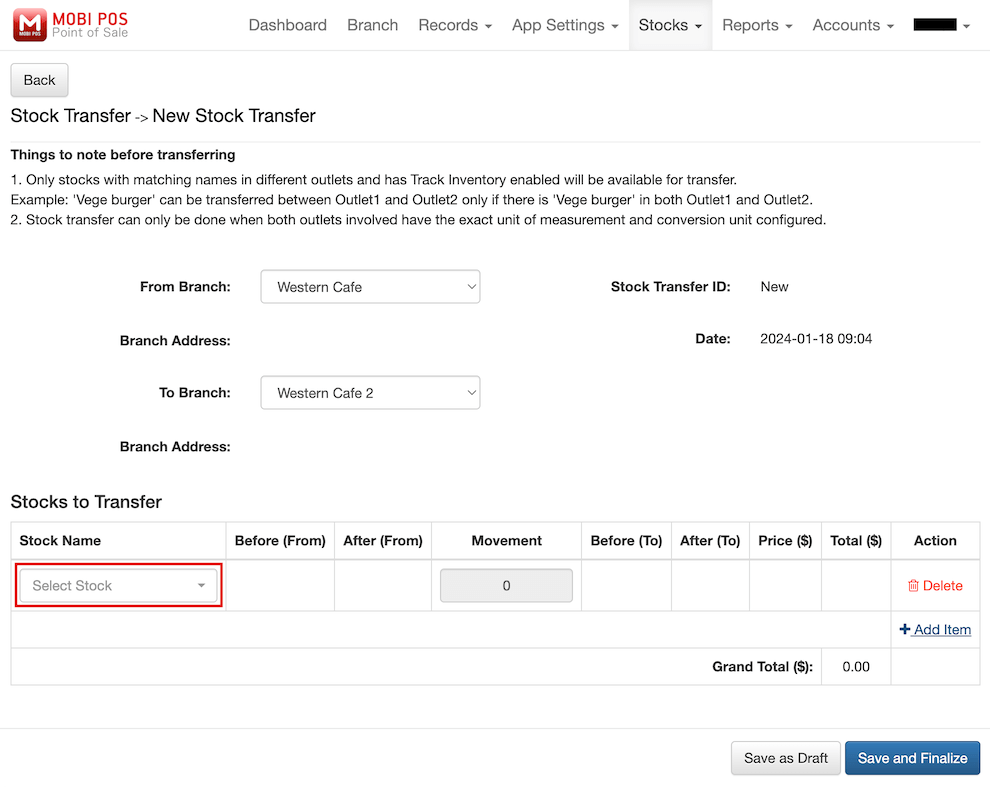
Please note that only items with matching names in different outlets can be transferred.
For example, if you wish to transfer a 'Vege Burger', ensure that 'Vege Burger' exists in both Western Cafe and Western Cafe 2.
Additionally, stock transfers can only be completed when both outlets have the exact same unit of measurement and conversion unit configured.
The drop-down list will display the items with matching names in both outlets.
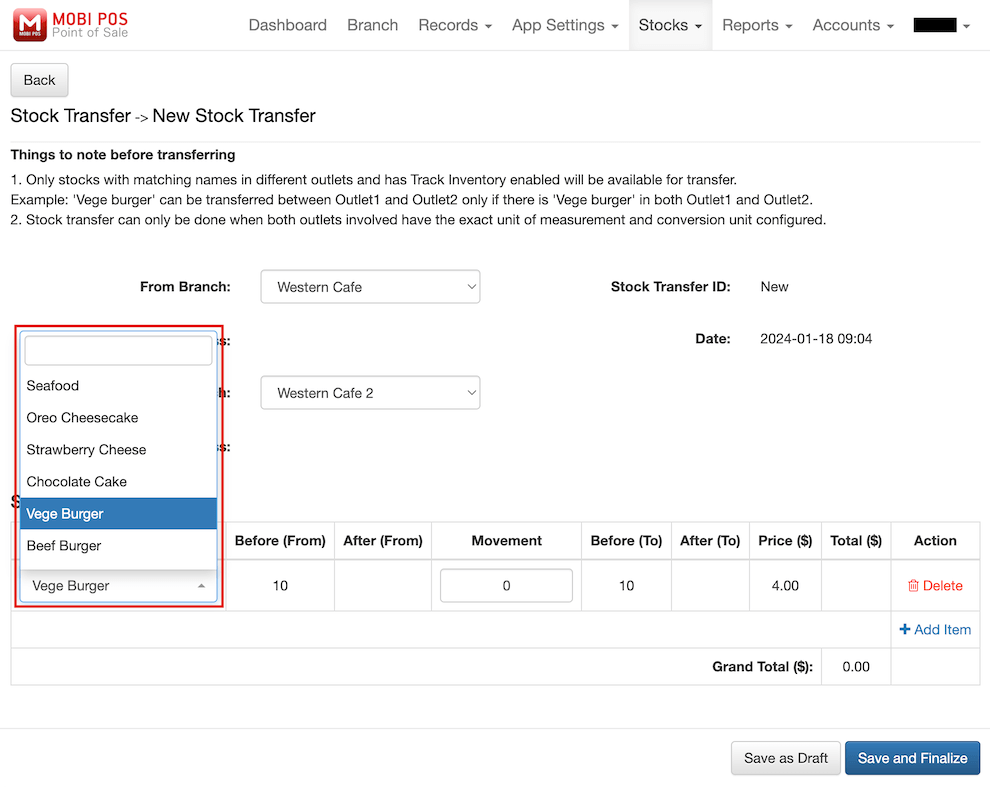
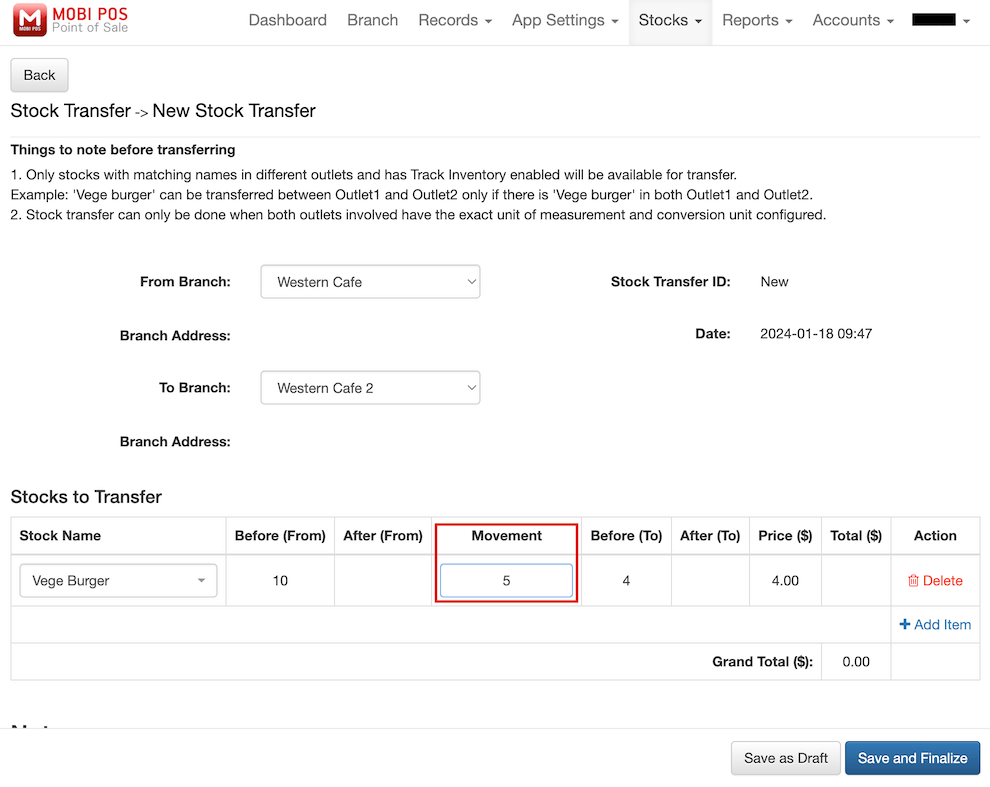
The first red-colored box indicates the number of stocks Western Cafe has before transferring to Western Cafe 2.
The second red-colored box indicates the number of stocks Western Cafe 2 has before being transferred from Western Cafe.
The third red-colored box indicates the price per 'Vege Burger’.
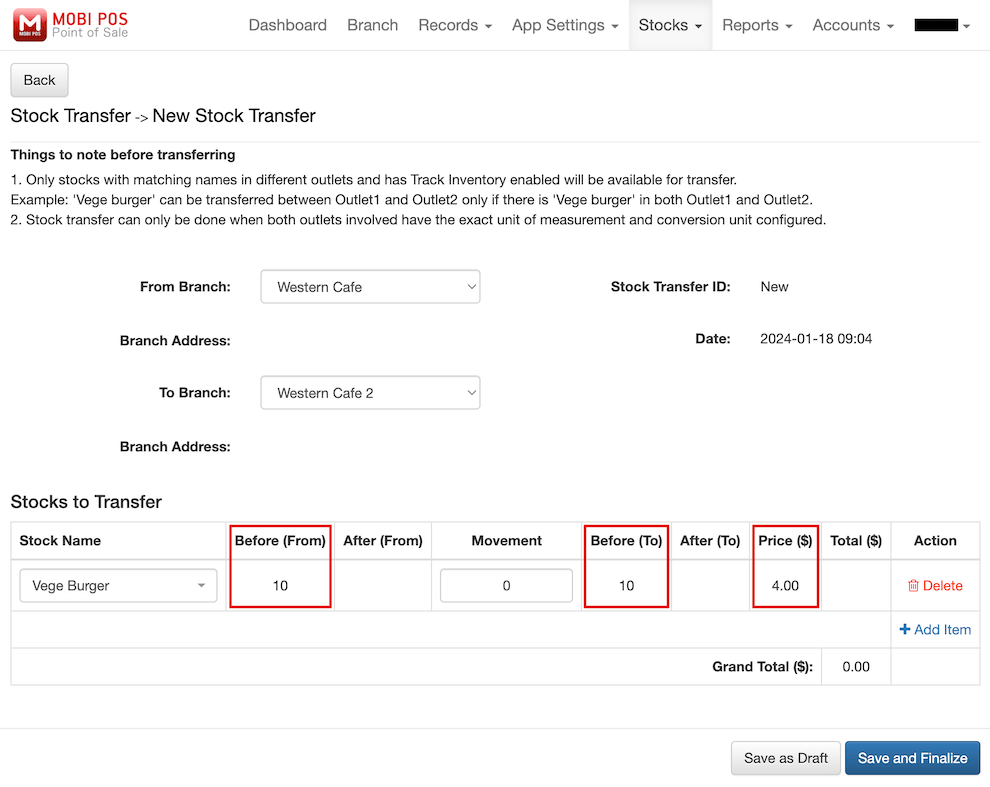
Now, key in the quantity you want to transfer in Movement.
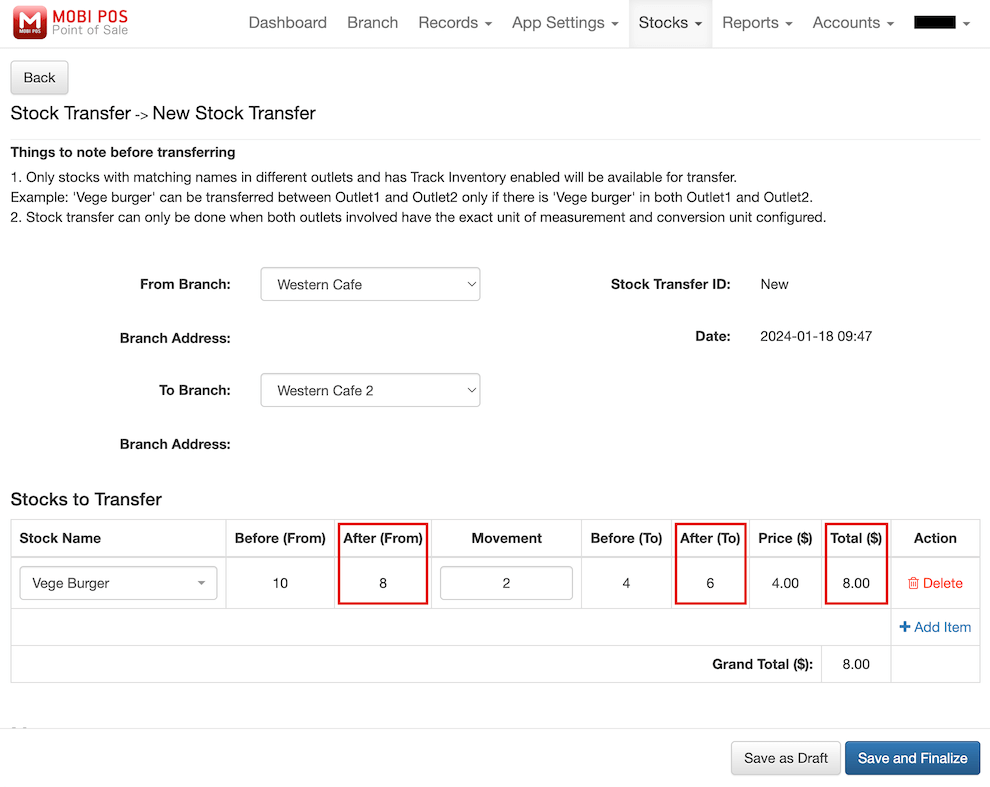
The first red-colored box indicates the remaining number of stocks in Western Cafe after transferring to Western Cafe 2.
The second red-colored box indicates the number of stocks Western Cafe 2 has after receiving stocks from Western Cafe.
The third red-colored box indicates the total price of the items being transferred.
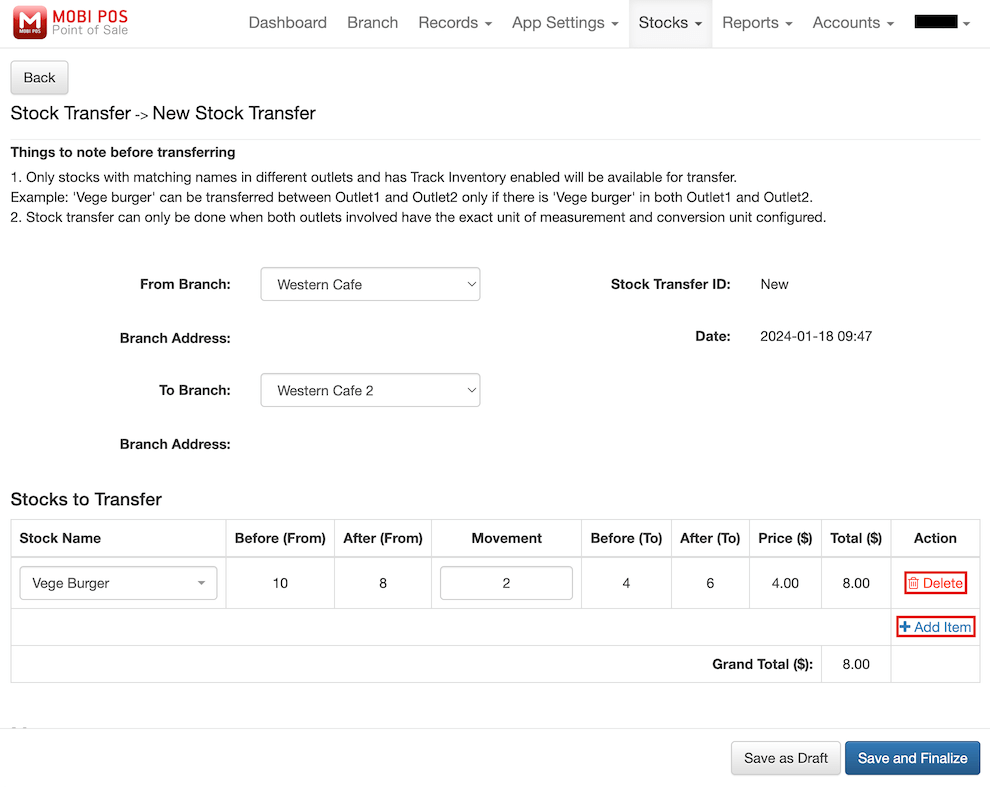
You can always delete the items you want to transfer by clicking on Delete.
Alternatively, you can add more items that you want to transfer by clicking Add Item.
The Grand Total will also be calculated.
Additionally, you can also choose to leave a note or description for the stock transfer to help the staff from different outlets understand better or for easy reference in the future.
Finally, you can save the stock transfer information.
You can either Save as Draft if you wish to modify it in the future or Save and Finalize to proceed with the transfer process.
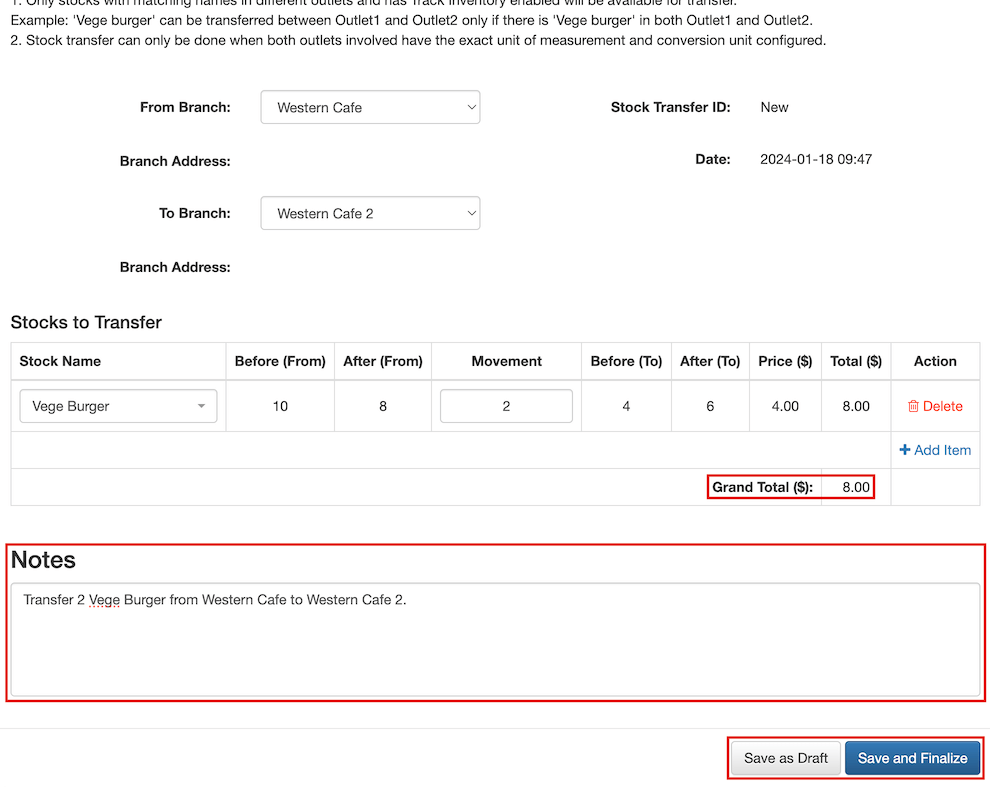
Upon Save and Finalize, the transfer will be made when your POS system comes online.
Then, you can view the details for the stock transfer you have made.
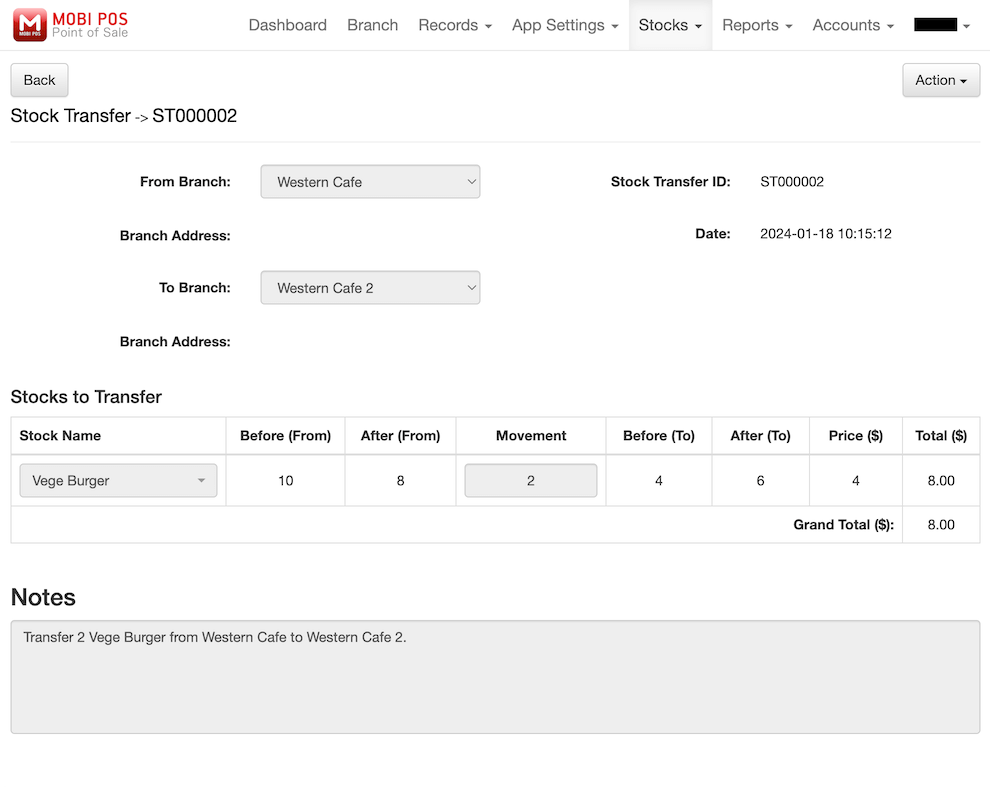
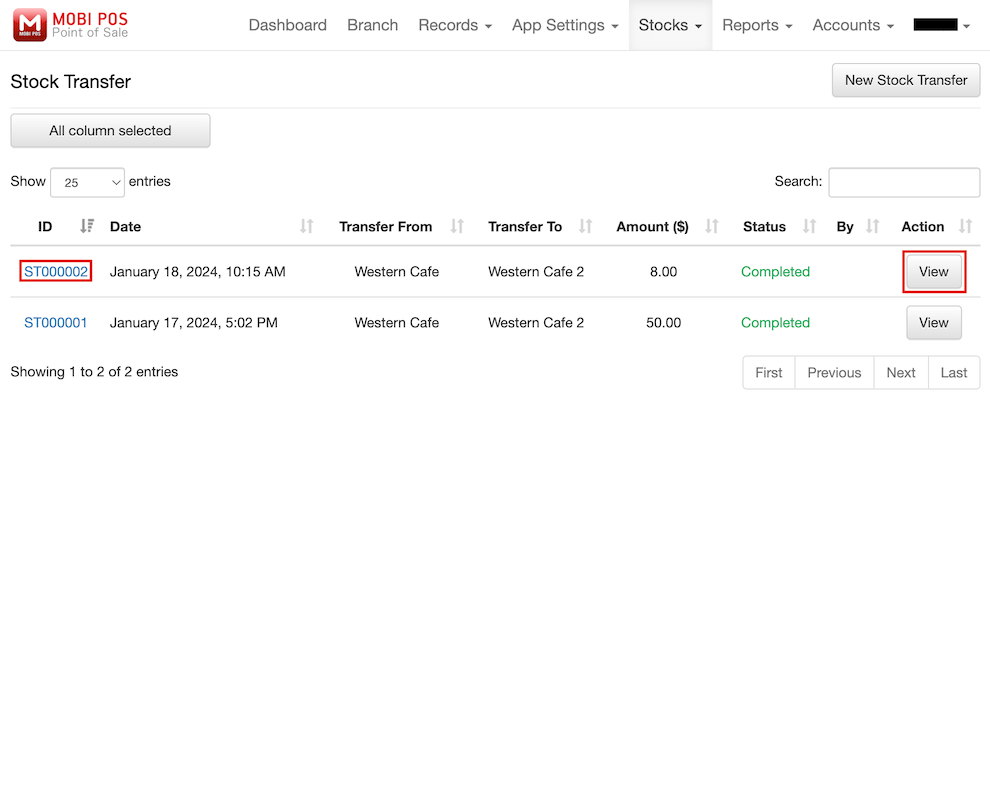
Back to the Stock Transfer page, you can view a list of stock transfer histories you have made.
You can always click on the ID of each stock transfer or the View button to see the details of that particular stock transfer.
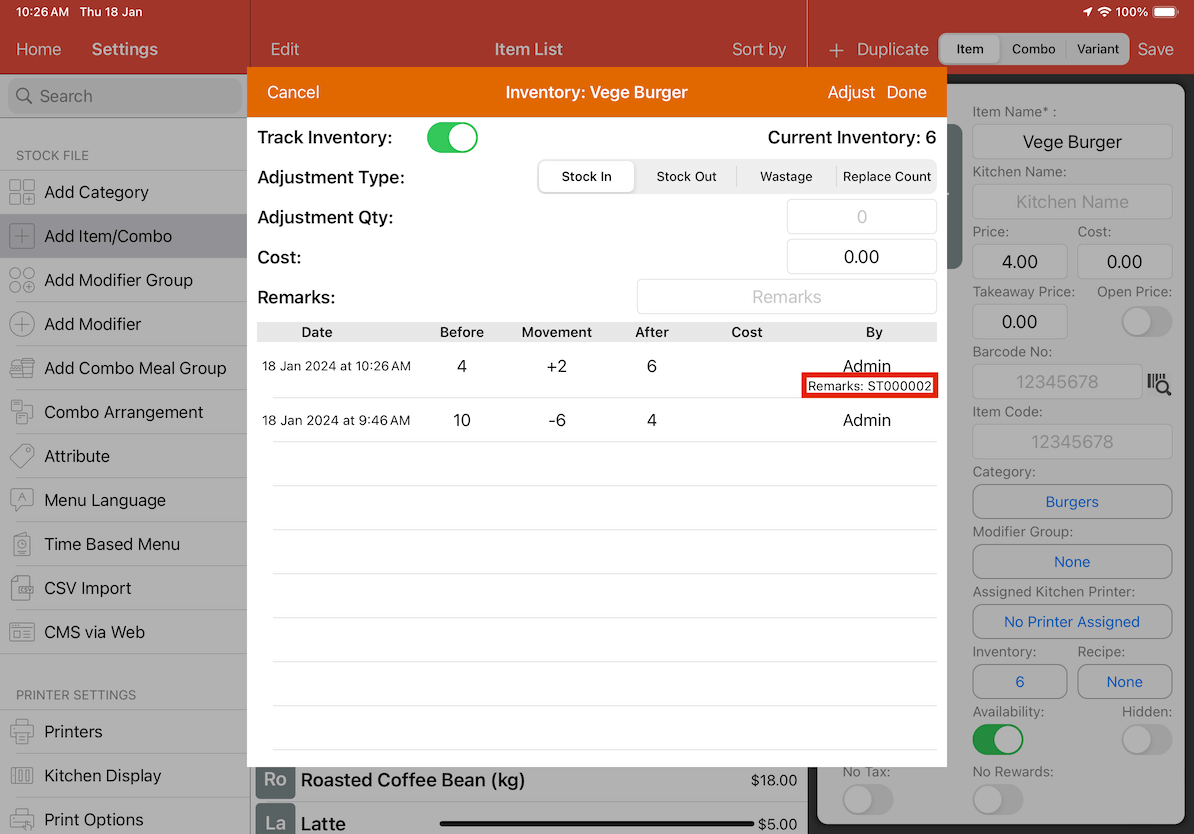
You can also check the inventory of the items on the POS device.
In this example, we will demonstrate using the POS device for Western Cafe 2, which received stock from Western Cafe.
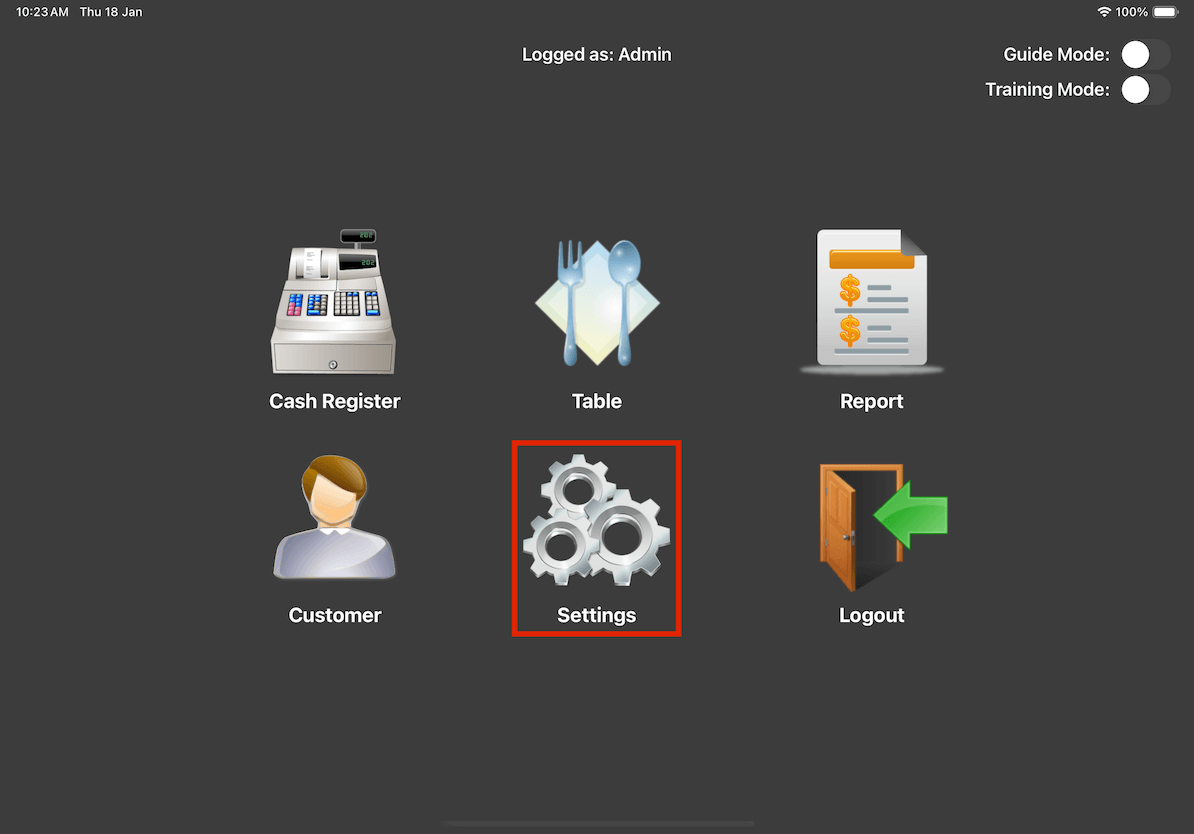
Firstly, the staff of Western Cafe 2 needs to click on Settings in the main menu.
Then, click on Add Item/Combo in the left navigation bar.
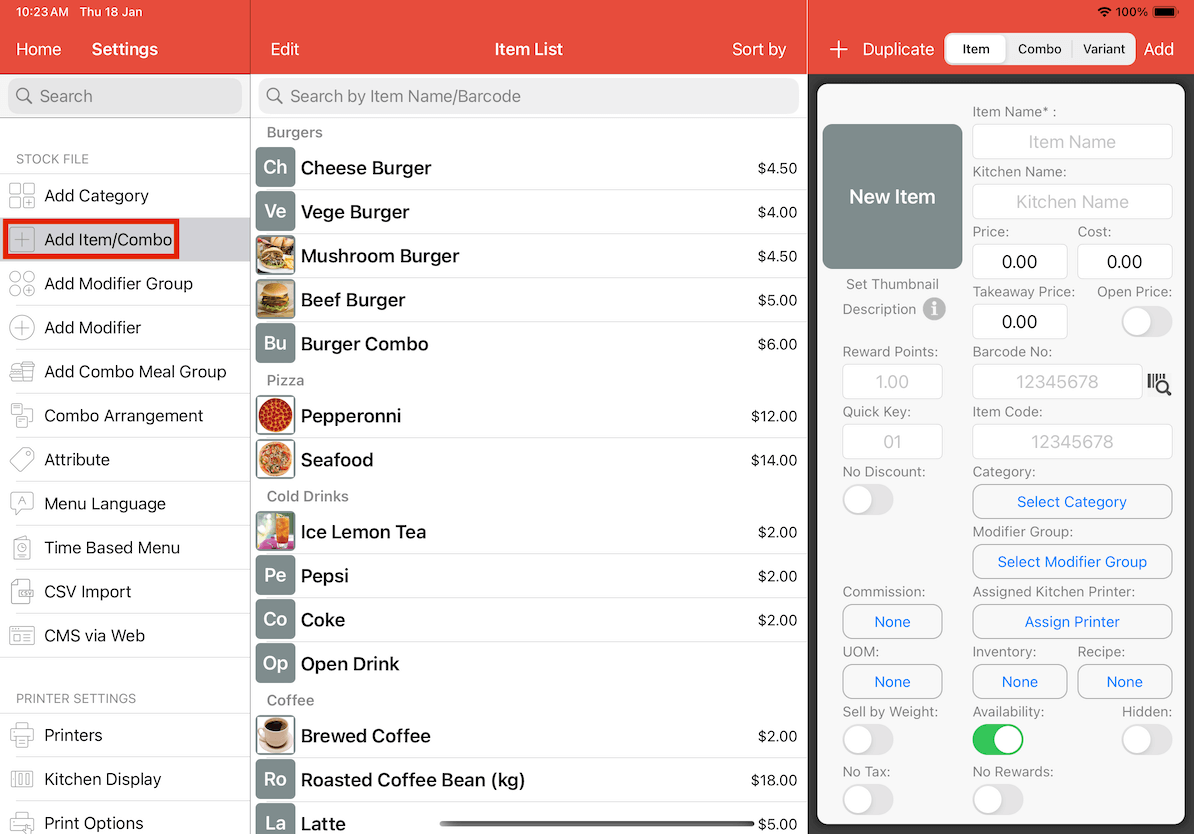
Look for the item which you have received stock and click on it.
Then, click on Inventory.
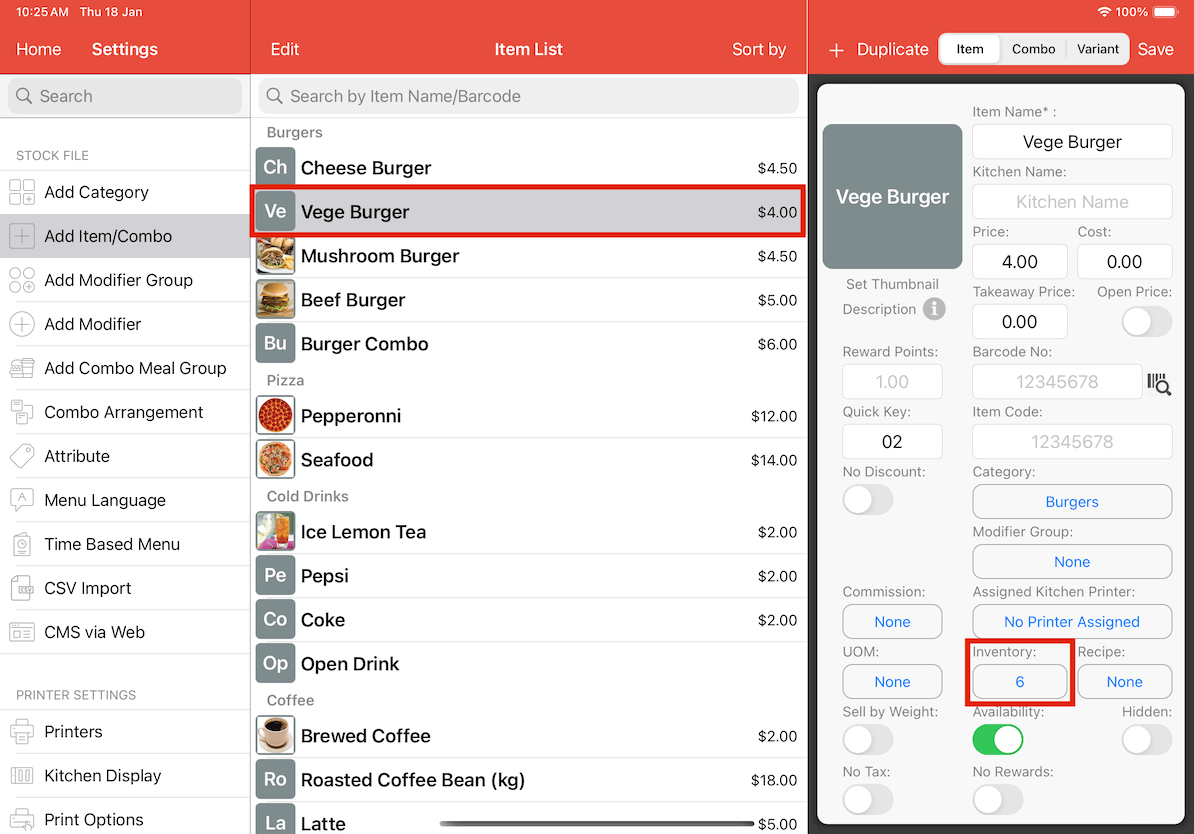
We can see that we have received 2 'Vege Burger’.
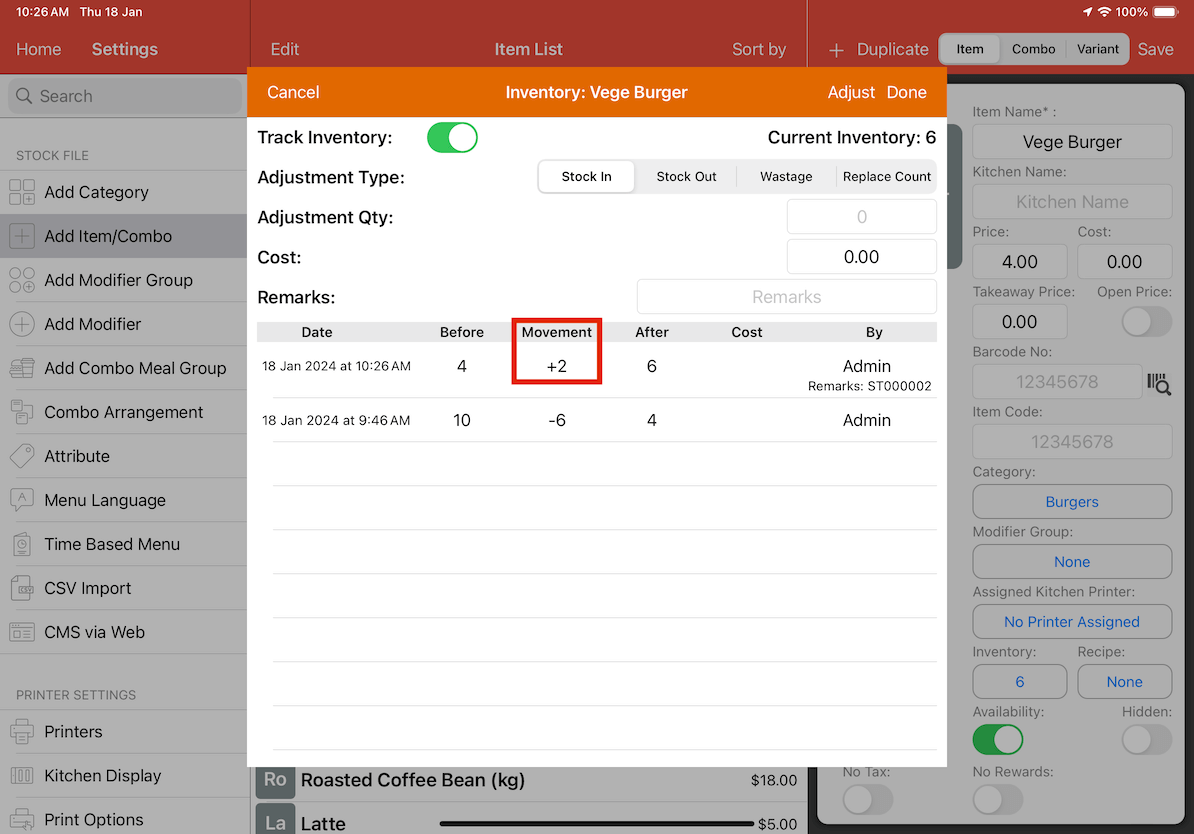
The ST in remarks indicates Stock Transfer.
