Guide | MobiPOS > Report > Report Template
Report Template
Report templates can be used to save a set of preset filters for future use.
Templates are saved according to types of reports.
In this guide, we will use Order Report that is generated for date "2024-08-23".
We have 19 rows of data as shown below.
To configure report templates, click on the "Report Template" button in the black box.
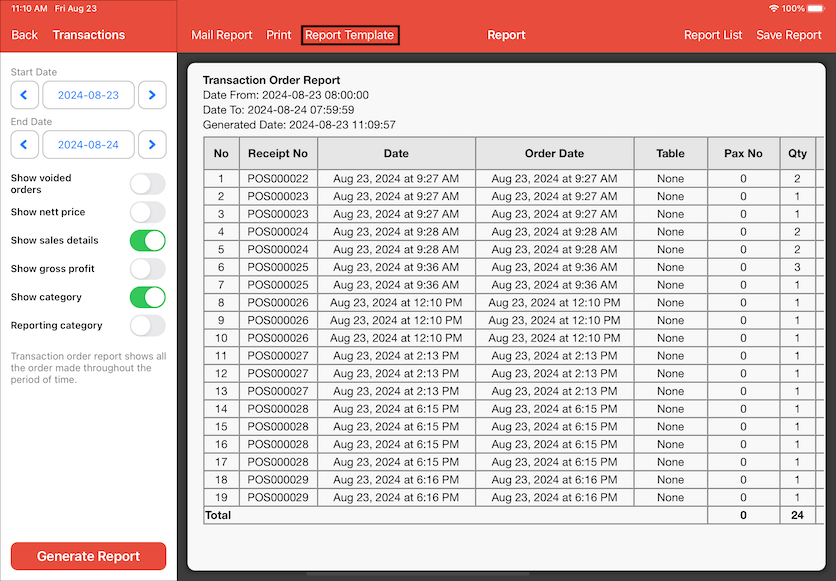
Report Template Configurations
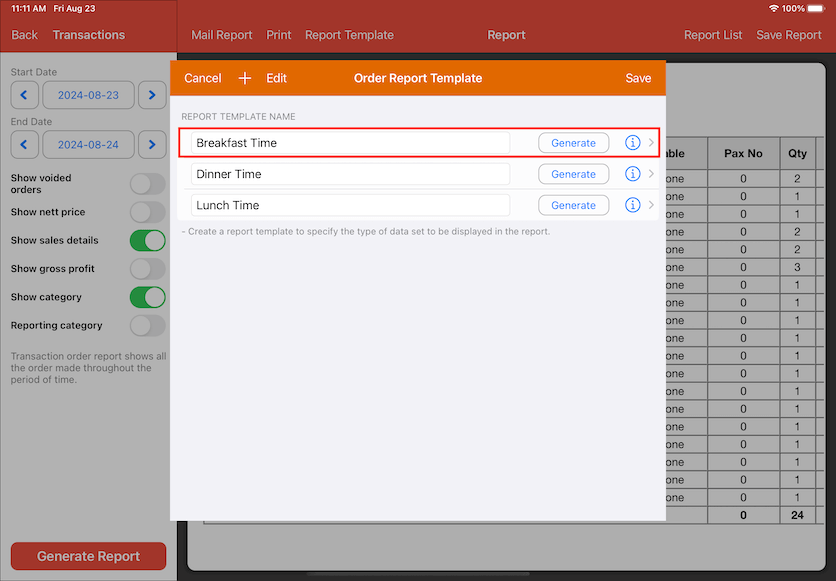
In the following screenshot, we have a list of preset templates.
You configure your template name here.
Press the ⓘ button on the right to further set up your template.
We will use "Breakfast Time" as our example here.
After pressing the ⓘ button, a full list of table headers will be shown in sequence.
The title "Breakfast Time" indicates that we are configuring for this specific template.
Toggle the button to show or hide headers from the report.
For example, "Order Date", "Table", and "Pax No" are toggled to be hidden from the report, while "Date" is selected to be shown.
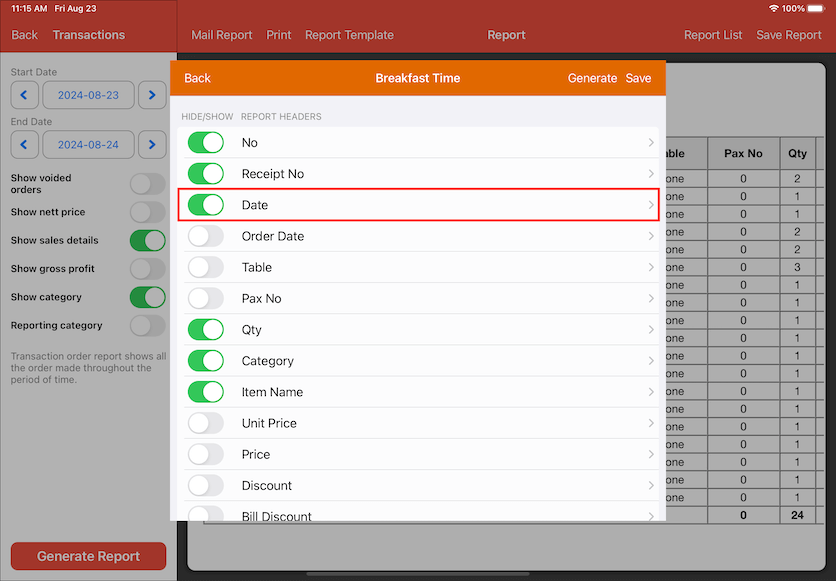
The report header "Date" is selected as an example shown below.
By pressing into report headers, you can sort and filter data under the specified report column.
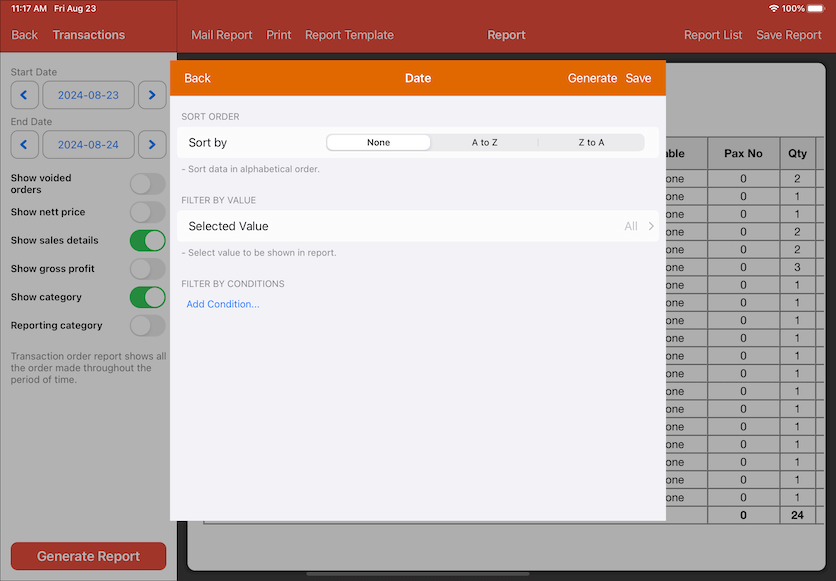
Configure filterings
There are 3 types of sorting configuration for header column.
Sort Order, Filter by Value, and Filter by Conditions.
Sort Order
None - No sorting order will be implemented.
Ascending - Sorts data from A to Z, or smallest to largest number in the report header.
Descending - Sorts data from Z to A, or largest to smallest number in the report header.
Filter by Value
You may select specified values to be displayed in the report header shown below.
For example, we will be selecting time values that are within 9am till 12pm since we only need breakfast time sessions.
Press Set after selecting the values needed.
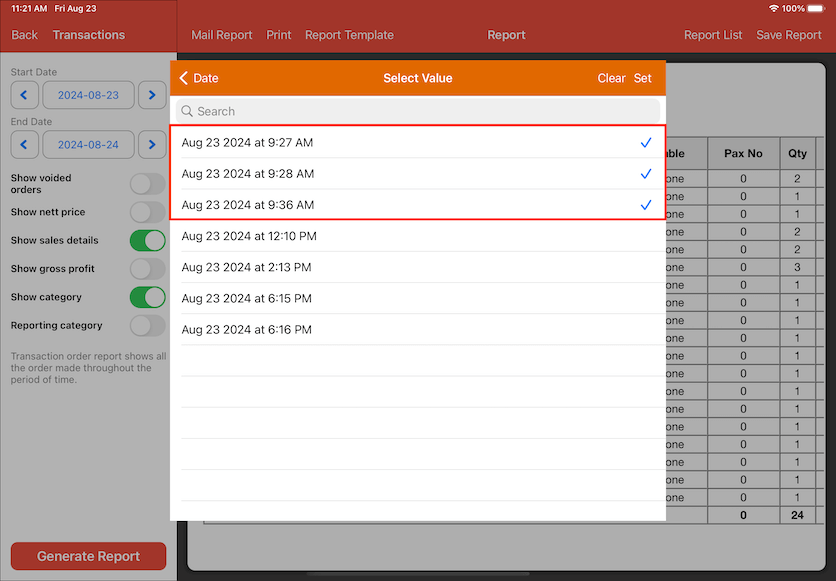
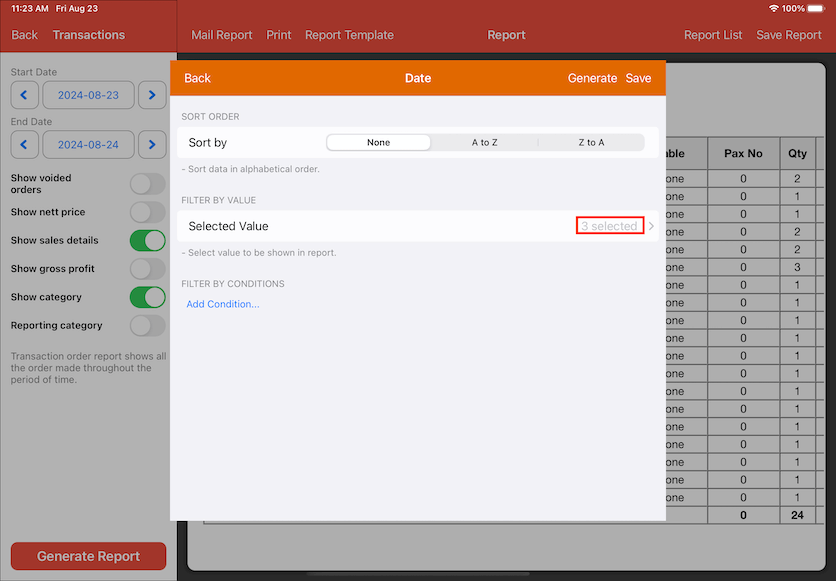
After pressing Set, the filter is applied and the number of selected values will be displayed as shown below at the highlighted box.
You may press Save and generate the report with the selected filters by pressing Generate.
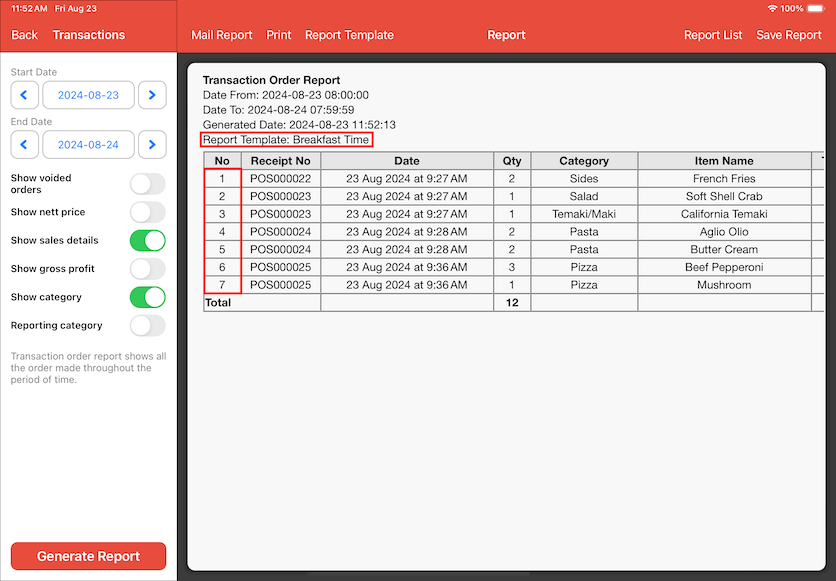
After pressing Generate, the report will be generated with the filters applied.
The example below shows the filtered values for column 'Date'.
There are only 7 rows of column with the time within 9am till 12pm.
Filter by Conditions
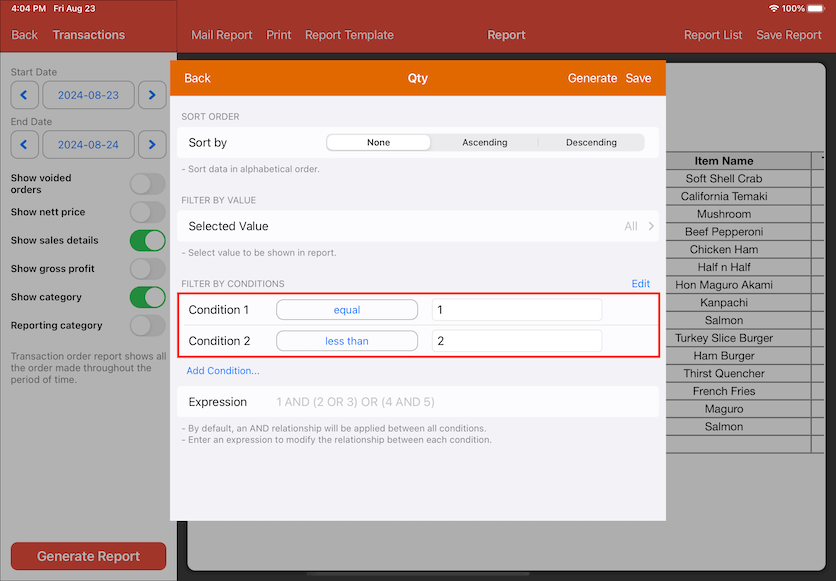
Select a condition and enter the specified Condition Value on the red box highlighted.
Additional conditions are allowed to be created if necessary by pressing on "Add Condition..." below the first condition.
We will be using column "Qty" as an example.
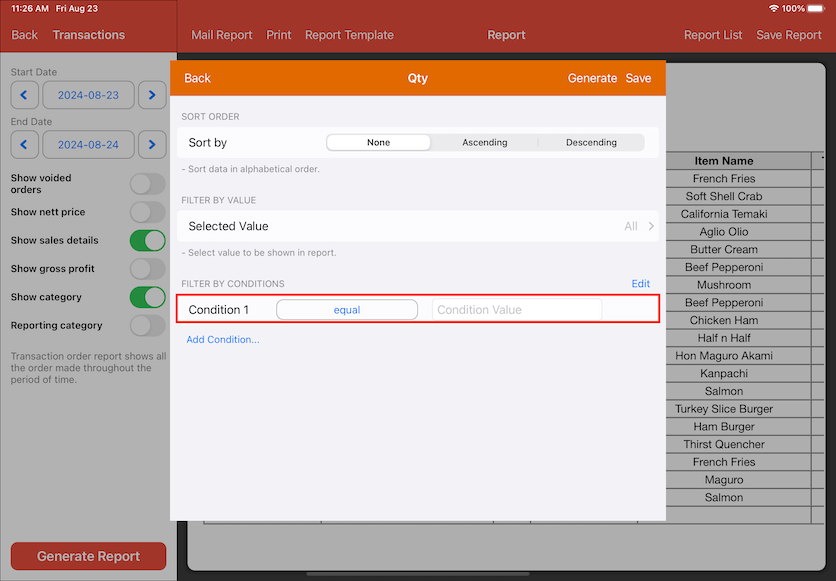
For example, if you wish to only see "Qty" with equal to 1 and less than 2, you may configure it this way according to the picture below.
An "AND" relationship will be applied by default if left blank.
The expression box highlighted below is to configure relationship between each condition.
You may choose to save the filter applied or proceed to fill in your own expression highlighted below.
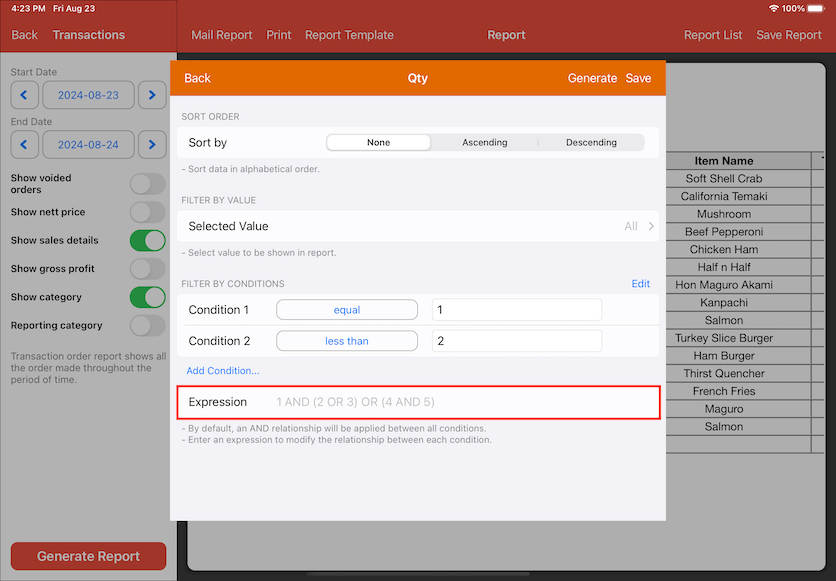
You may enter your own expression on the red box highlighted below.
We will be using the expression "1 OR 2" as an example.
You may press Save after applying the expression.
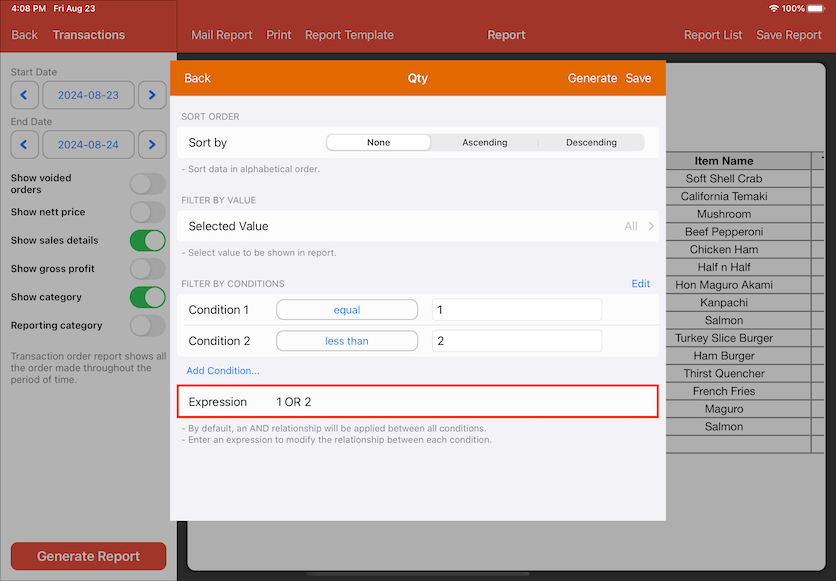
After pressing Save, the filter will be applied to the report.
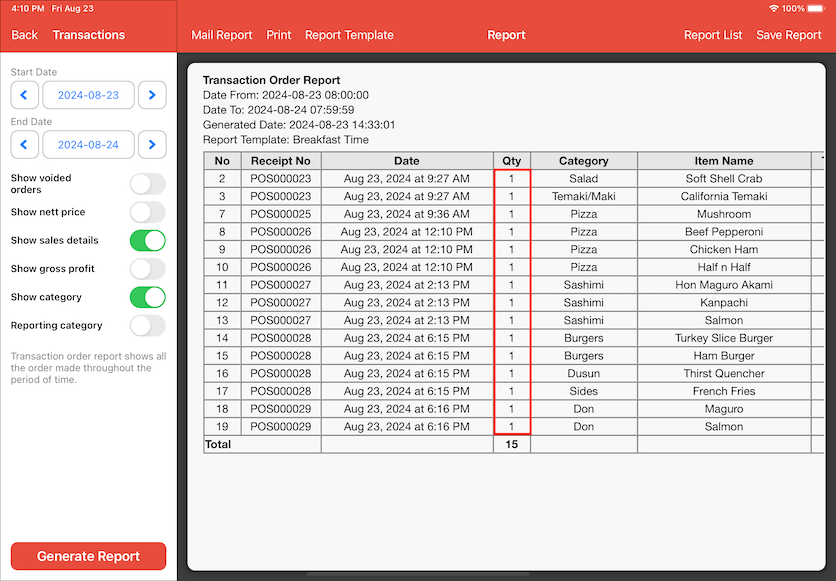
Press Generate to apply the filter into the report, the template name will be shown on the top of the report.
The example below shows the red box highlighted as the result after applying the expression from the screenshot above into the report.
After the filter configurations, the report templates can be implemented when needed.