Guide | MobiPOS > CloudSync > Inventory Management > Purchase Order
Purchase Order
Users can generate purchase orders using MobiPOS CloudSync.
This feature allows users to create a purchase order.
Once created, the purchase order can be emailed or downloaded.
When the order or item is received from the supplier, users will need to edit the order on
how many quantities received along with the price if there are any changes.
When everything is received and done, mark the purchase order
as completed, and inventory in the pos system will be updated accordingly.
To use the purchase order function, please log in to CloudSync.
First, users will need to create the supplier's profile.
Go to Stocks -> Supplier.
At the top right corner, click on Add Supplier.
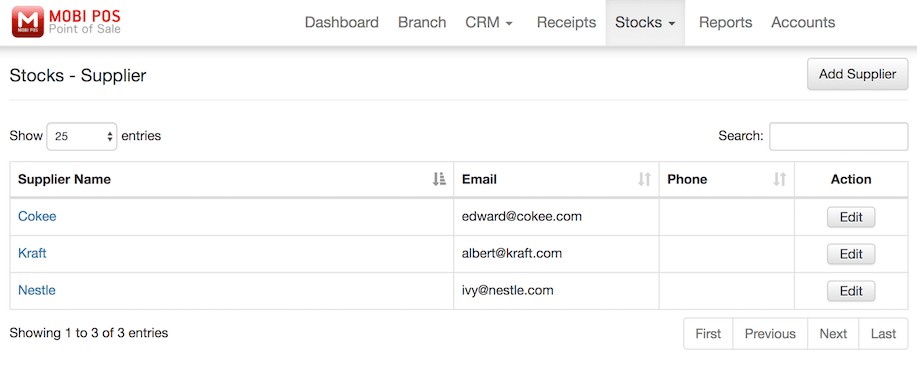
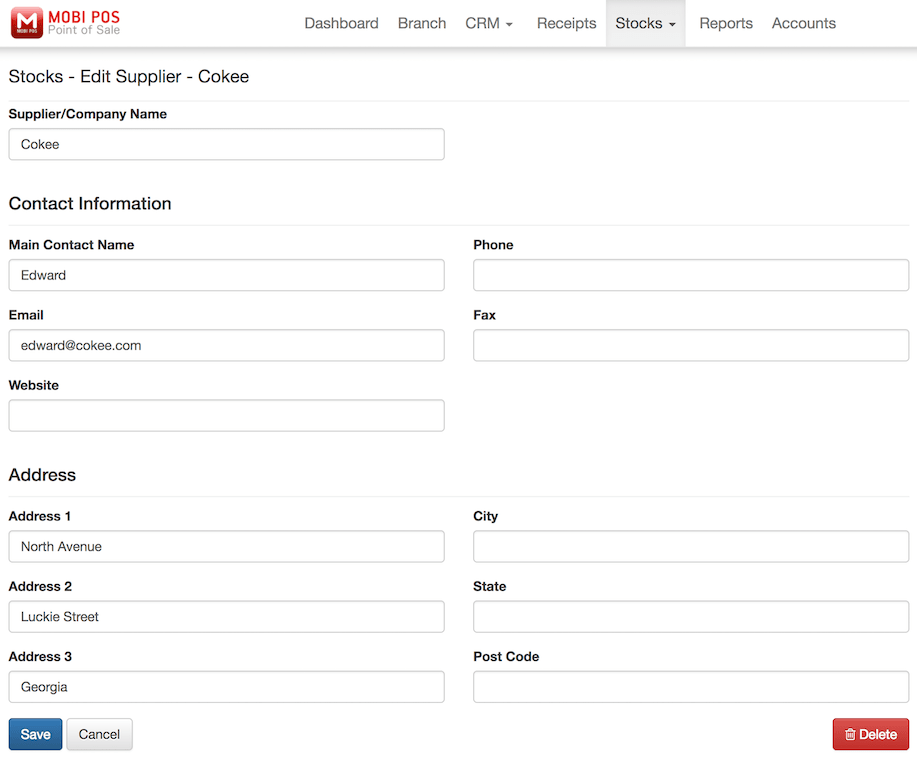
Then, fill in the supplier's information as shown below and click Save at the bottom left.
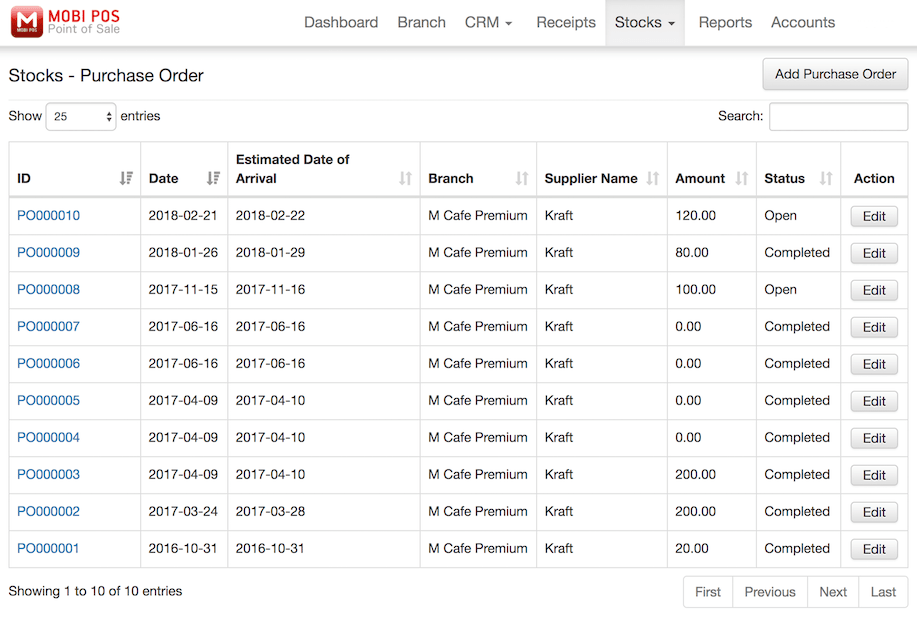
Next, go to Stocks -> Purchase Order.
At this page, it will show all the purchase order created previously.
The status of the purchase order will be shown, and users will be able to edit the purchase order under the
Action column.
For a purchase order that is received, it will show as Completed under the Status column, and
users will not be able to edit the order anymore.
In order to create a purchase order, click Add Purchase Order at the top right corner of the page.
It will then direct users to the page shown below:
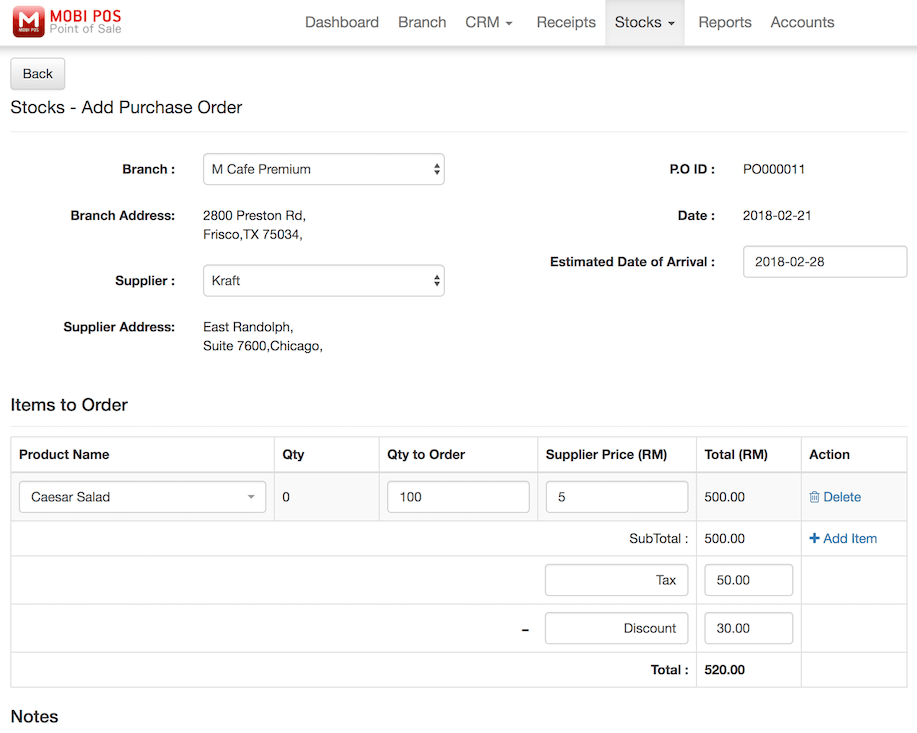
Steps to make a purchase order are explained as below:
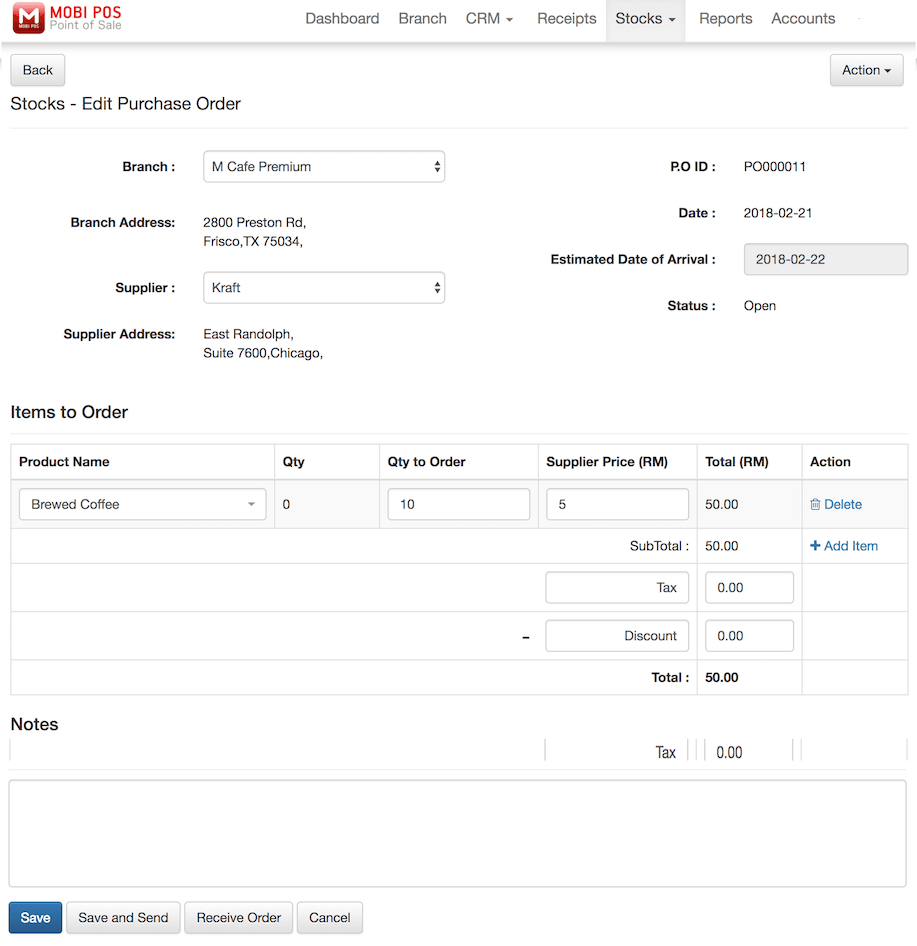
First, select the branch where this purchase order is created for as
this determines where the stocks will be shipping to.
After selecting the branch, the branch address will be shown automatically.
For more information on the branch setup, kindly refer to (LINK).
Next, select the supplier and the address of the supplier will be shown below.
Then, in the Estimated Date of Arrival column,
insert the date when the user wish the items to be delivered.
However, the actual date of arrival is not confirmed until the supplier confirm the availability.
After that, select the items to order.
Qty column will show the current inventory of the selected items in the branch.
Insert the quantity that you wish to order from the supplier under Qty to Order.
Under the Supplier Price, insert the item price that the supplier has set.
Users will need to calculate the tax and discount manually if applicable.
The system will calculate the total amount accordingly.
To add purchase item, click on Add Item under the Action column;
To delete the item row, click on Delete under the Action column.
Users can put remarks for suppliers under the Notes column.

After inserting all the relevant information, click Save at the bottom left of the page.
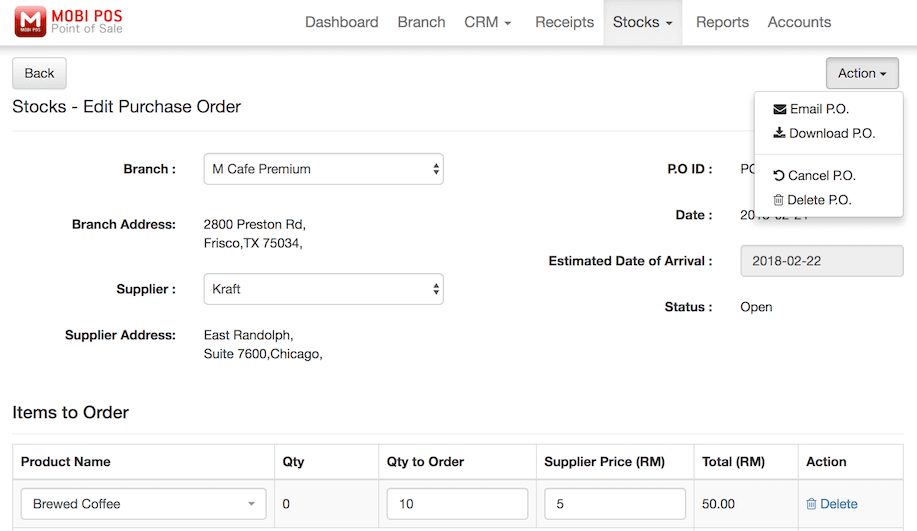
After saving it, if users wish to email or download the purchase order, click Action and choose whether to email or download the purchase order.
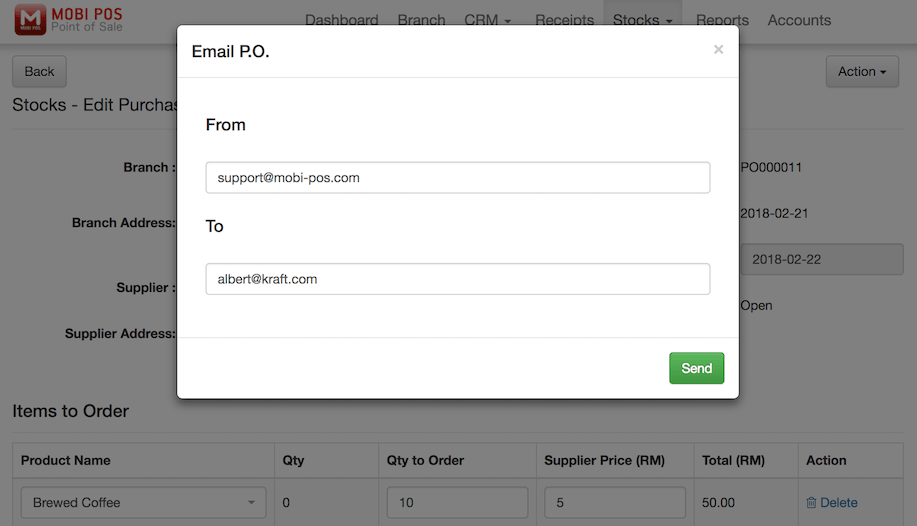
The email address will be inserted automatically with the chosen supplier.
Users can also send the email to a different email address.
Just remove and insert the correct email address in the recipient's column.
Then, click Send.
Upon receiving the order, the user is required to login back into CloudSync and search for the purchase
order created previously.
Edit the respective purchase order and click Receive Order at the bottom left as shown below.
Insert the quantity received along with the supplier price if there are any changes.
Users can just click on All Products Received if the order received is the same as the order made.

Once the purchase order is updated completely, click Save and Mark Completed.
The inventory count in both CloudSync and POS system will be updated.
If the POS is offline, the inventory count will be updated when it comes online.
If users click Save instead, the status of the order will be shown as Partially Completed
instead of Completed at the Purchase Order.
Inventory count will still be updated in both CloudSync and POS based on the partially received quantity.