Guide | MobiPOS > Online Booking > Join Table
Join Table
This guide explains the functionality and setup process of join table. Join Table allows the combination of existing table arrangements to accommodate larger parties or bookings. To enable customers to select a number of guests beyond the preset table capacity, please follow the steps outlined below.
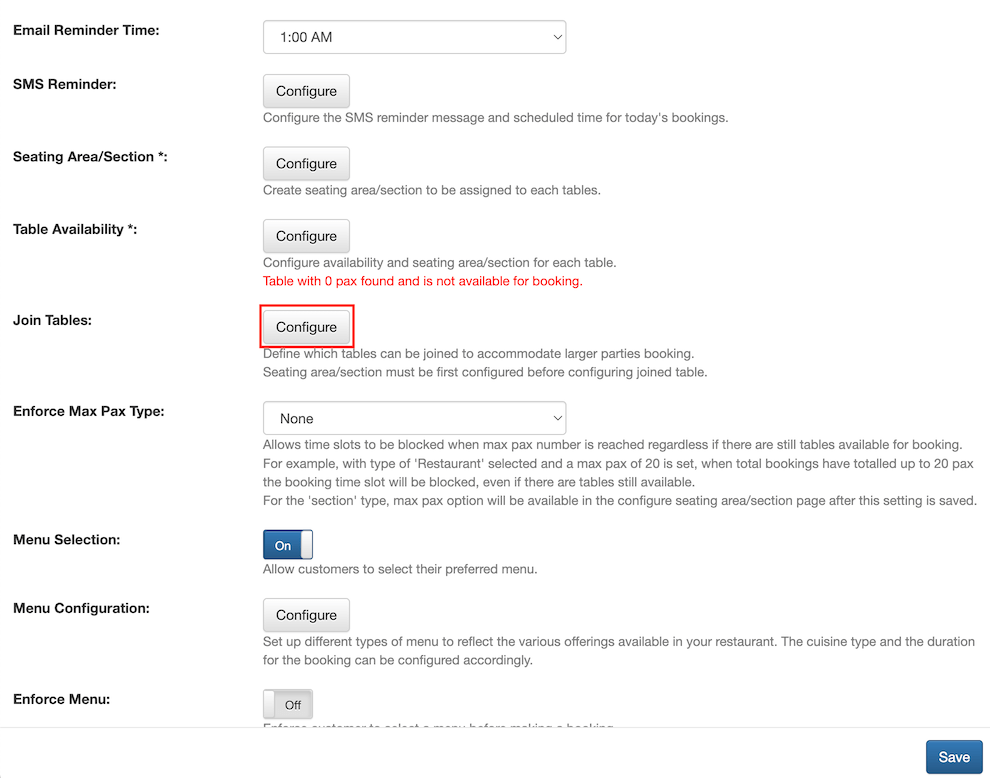
To Join Table, users must first configure the tables by clicking on Configure.
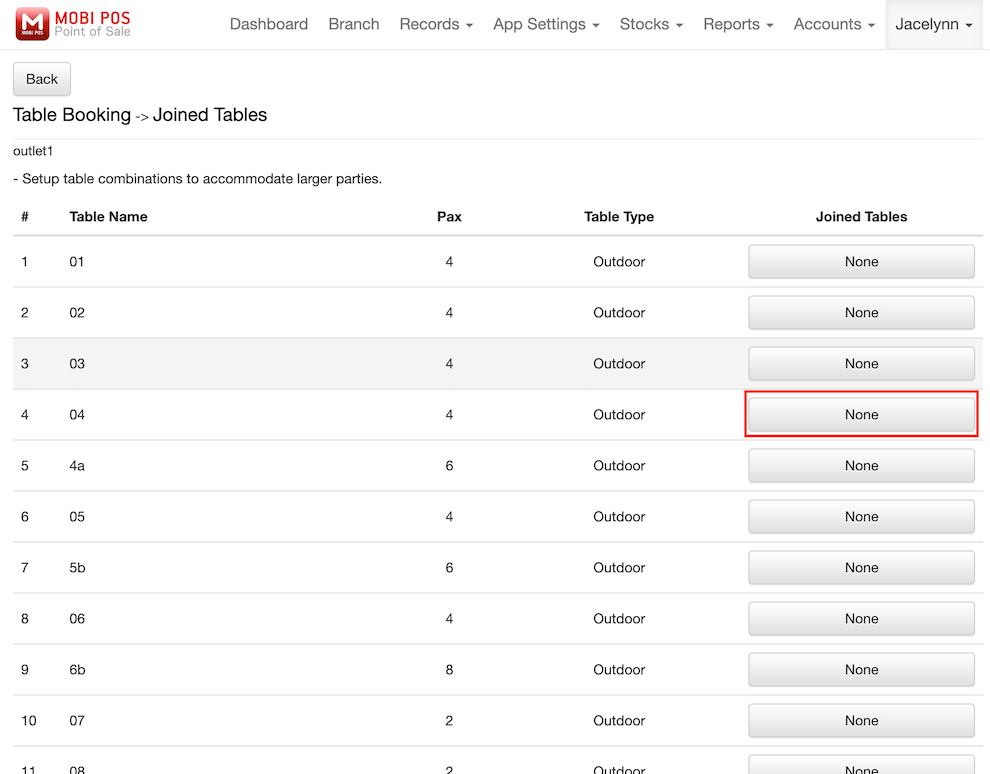
Users will be directed to the Joined Tables page, where you can view all the existing tables.
To select tables for joining, click on the button in the Joined Tables section.
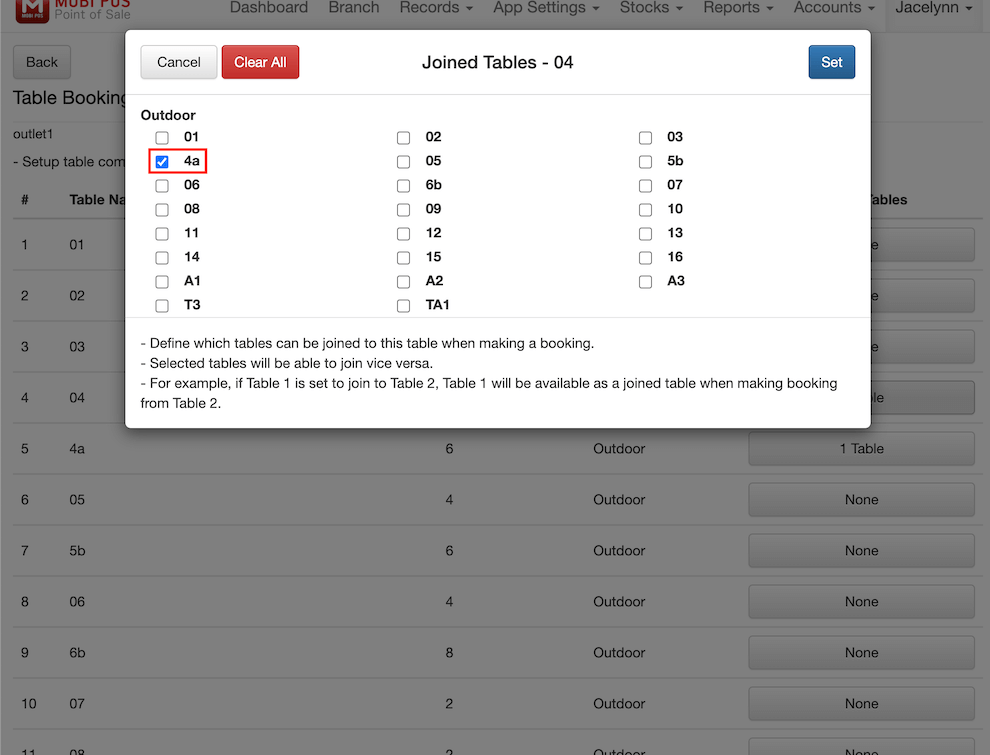
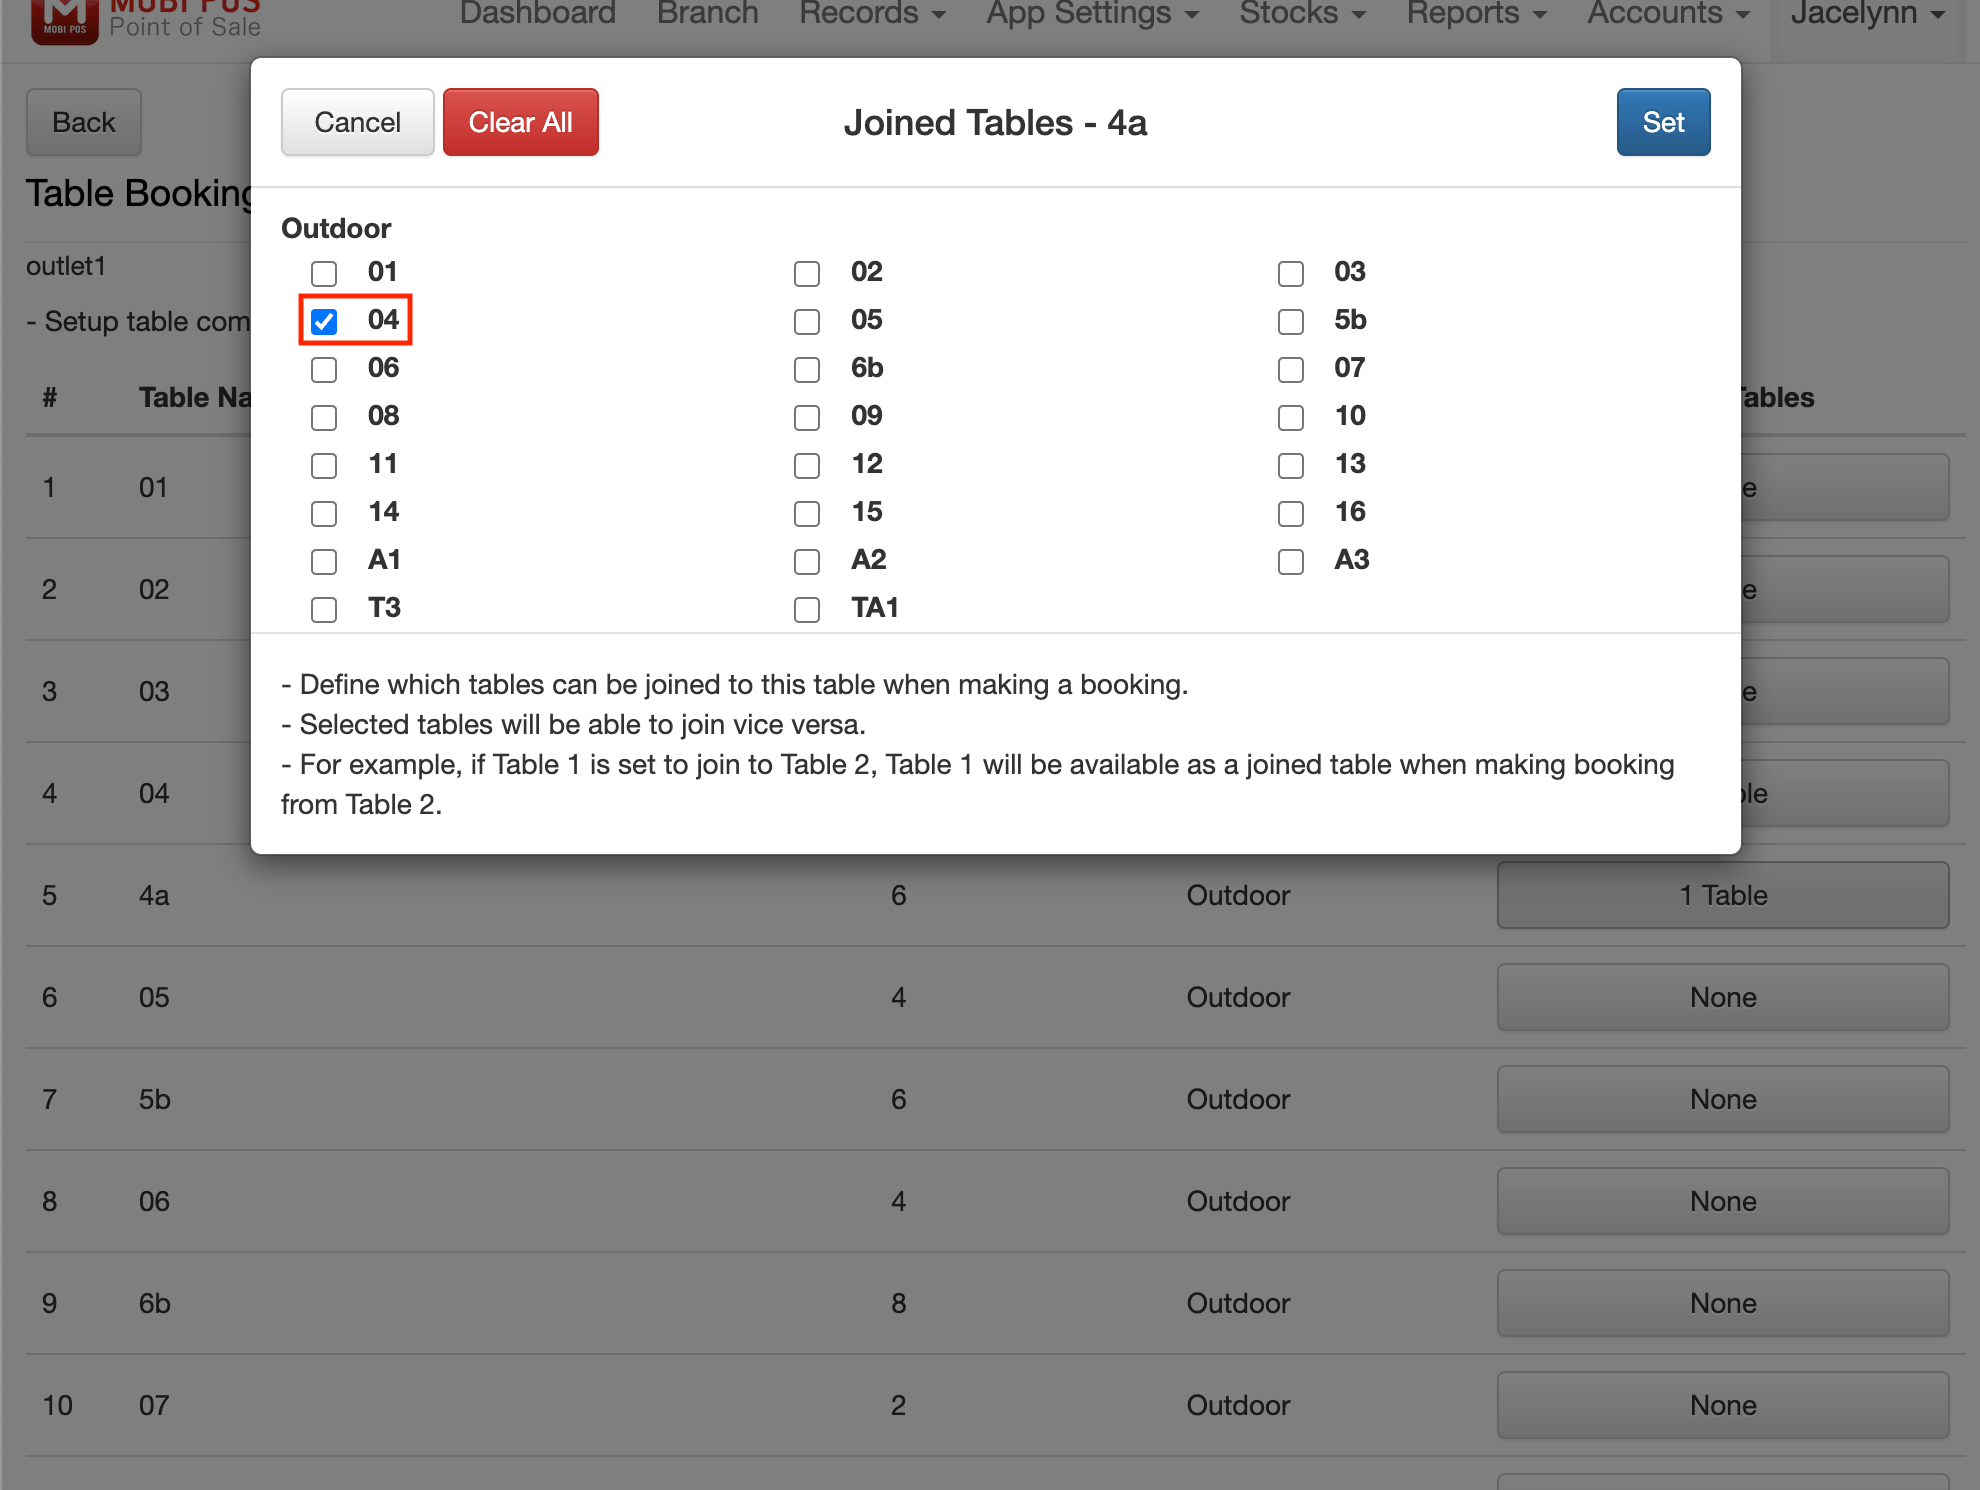
As shown in the image below, user has configured Table 04 to be joined with Table 4a, and conversely, Table 4a is set to be joined with Table 04.
When the tables are joined, the respective table capacities are summed up.
In this example, we joined Table 04 and Table 4a, resulting in a combined total capacity of 10 pax.
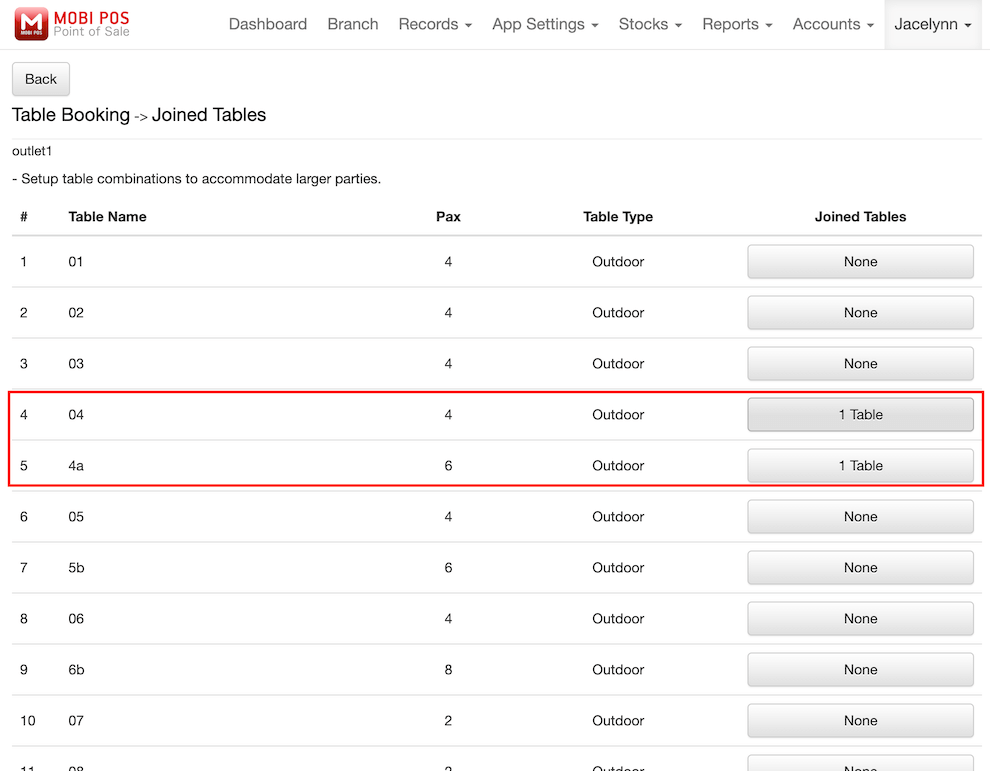
Once completed, click Save.
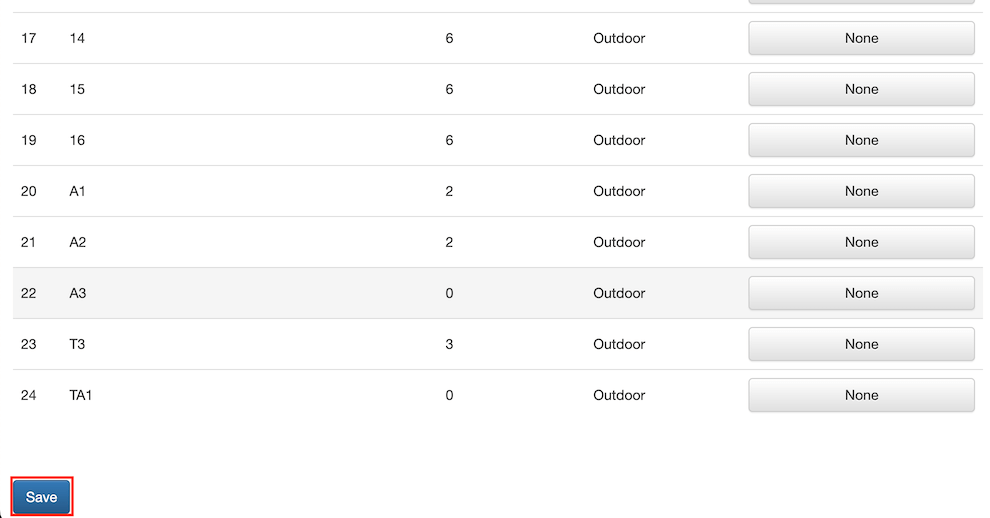
Prior to joining tables, the maximum table capacities was set to a maximum of 8 pax.
Customers can only book tables for 8 pax or fewer, and reservations beyond this capacity are not available as shown in the image below.
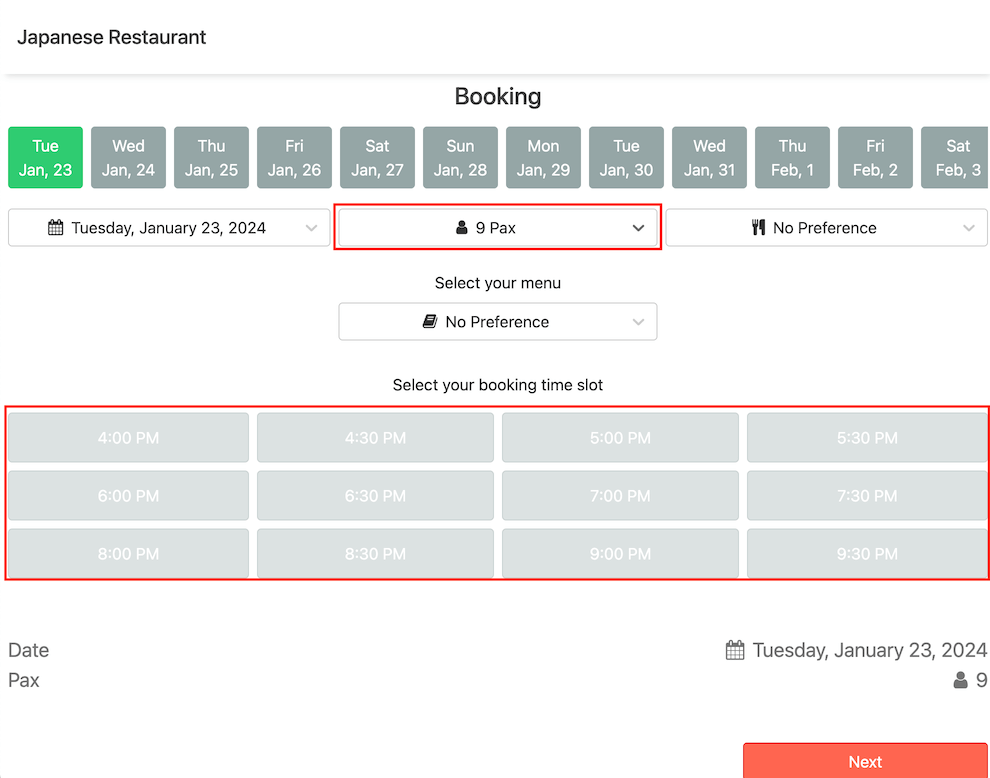
Upon combining Table 04 and Table 4a, customers can now make reservations for 10 pax as shown in the image below.
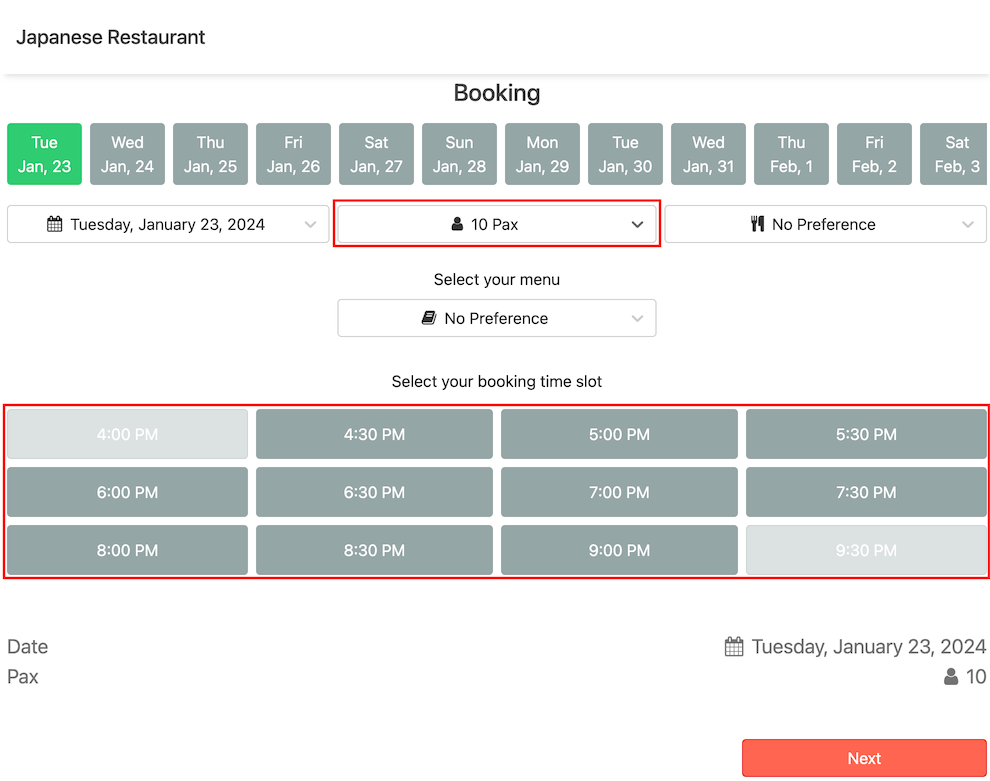
However, customers will be unable to make bookings for parties exceeding 10 pax, as this becomes the new maximum capacity after combining Table 04 and Table 4a, as illustrated in the image below.
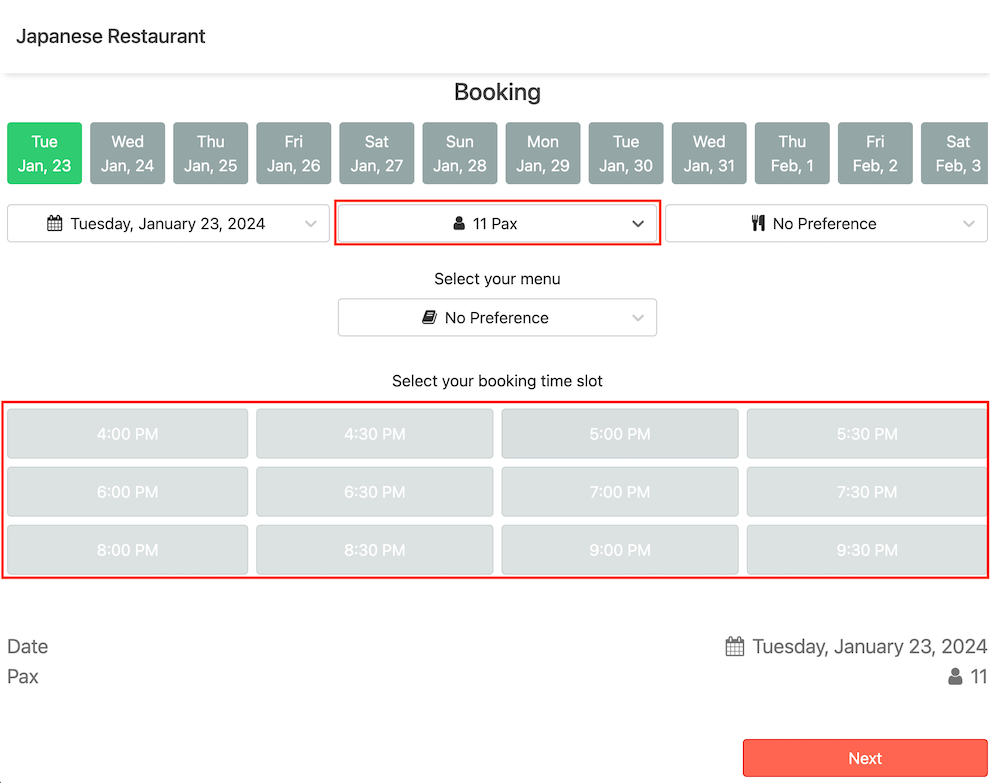
Customers will proceed with the booking procedures, and once the reservation is confirmed, they will gain access to the booking details.
The booking details will also specify the tables that has been reserved for the customer.
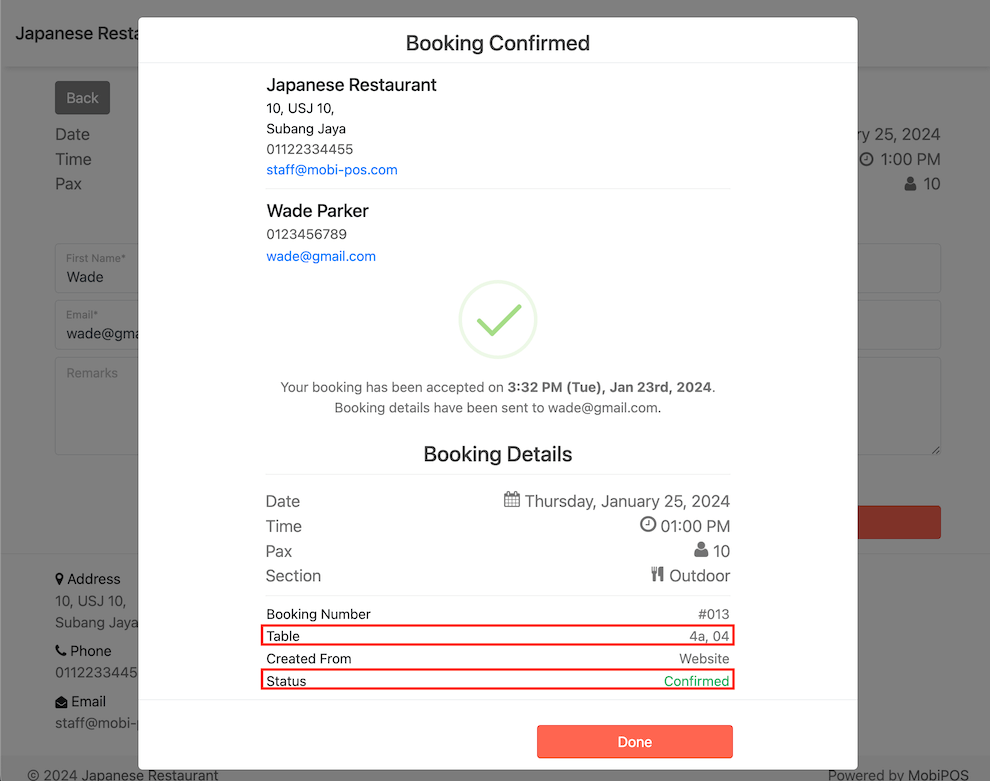
User will receive the booking notification on the MobiPOS app.
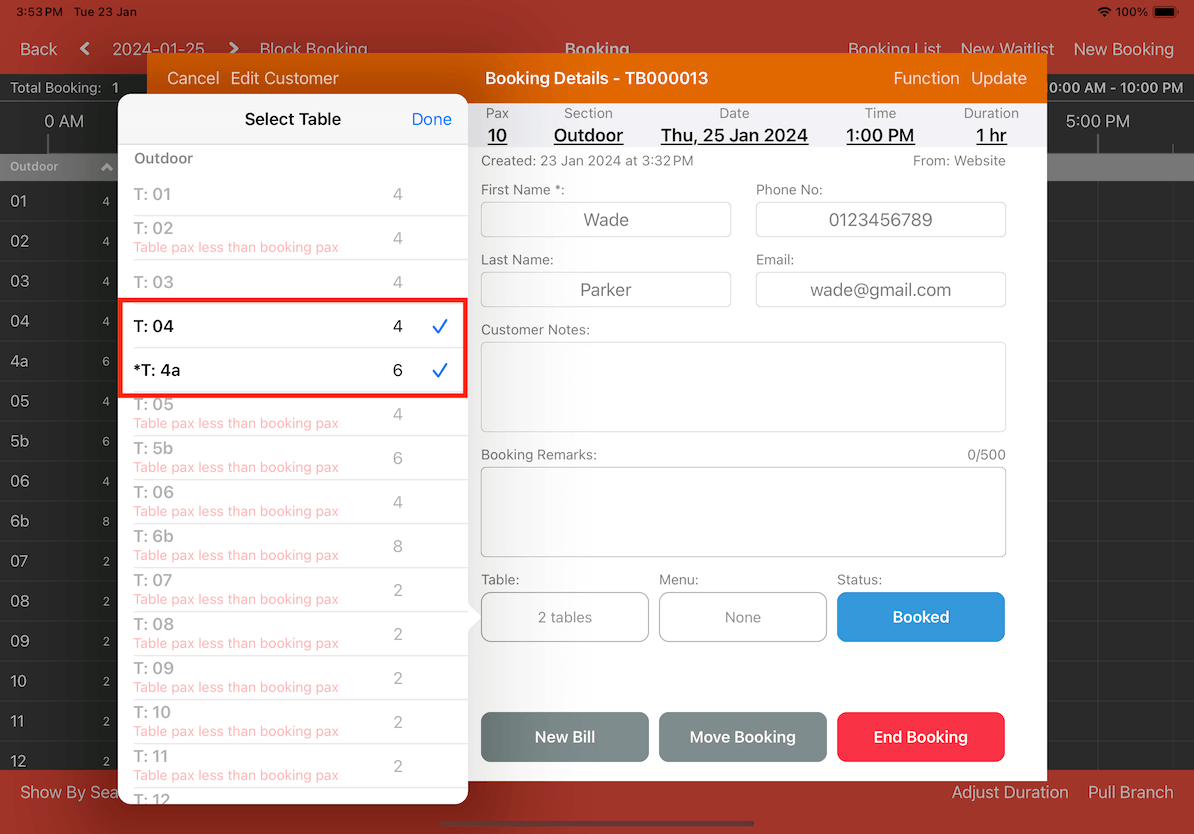
As you can see in the image below, Table 04 and Table 4a have been joined and are booked under the same name with 10 pax.
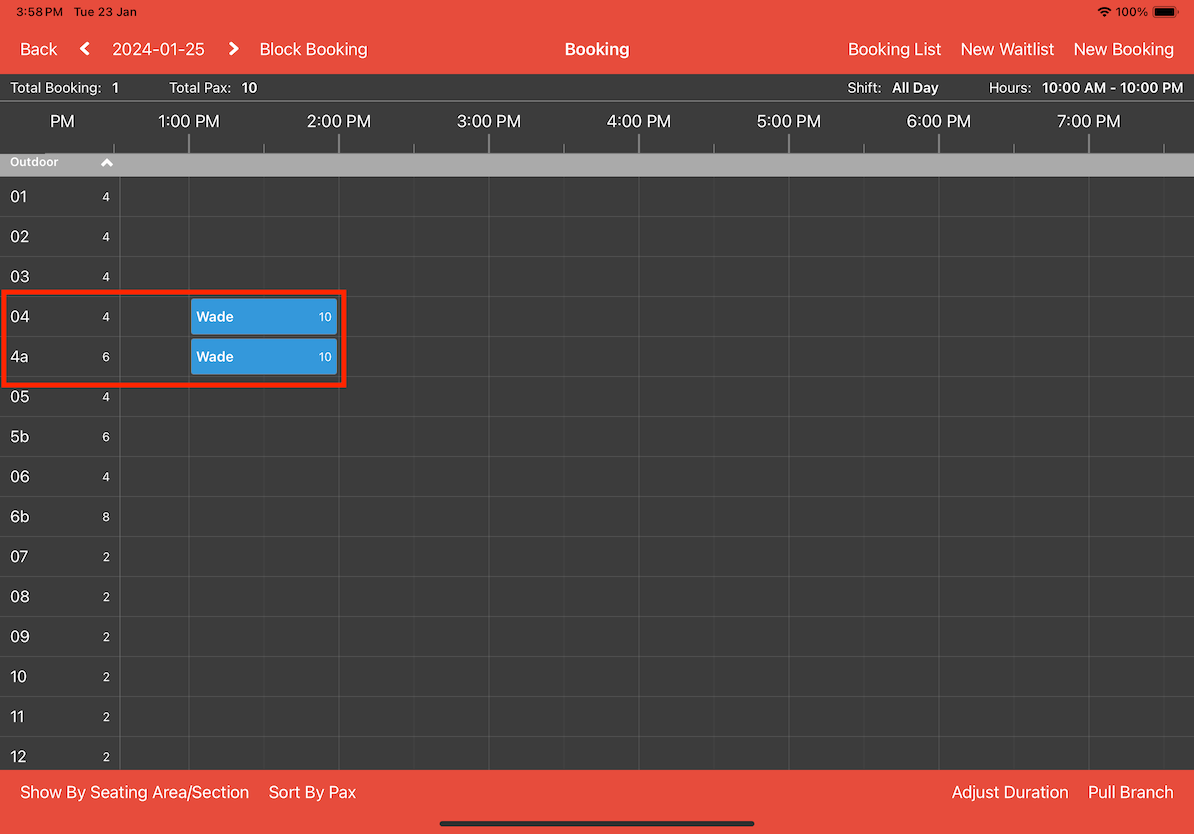
Click on the booking time slot to access the booking details. As shown below, this reservation is for 10 guests, and reserved 2 tables.
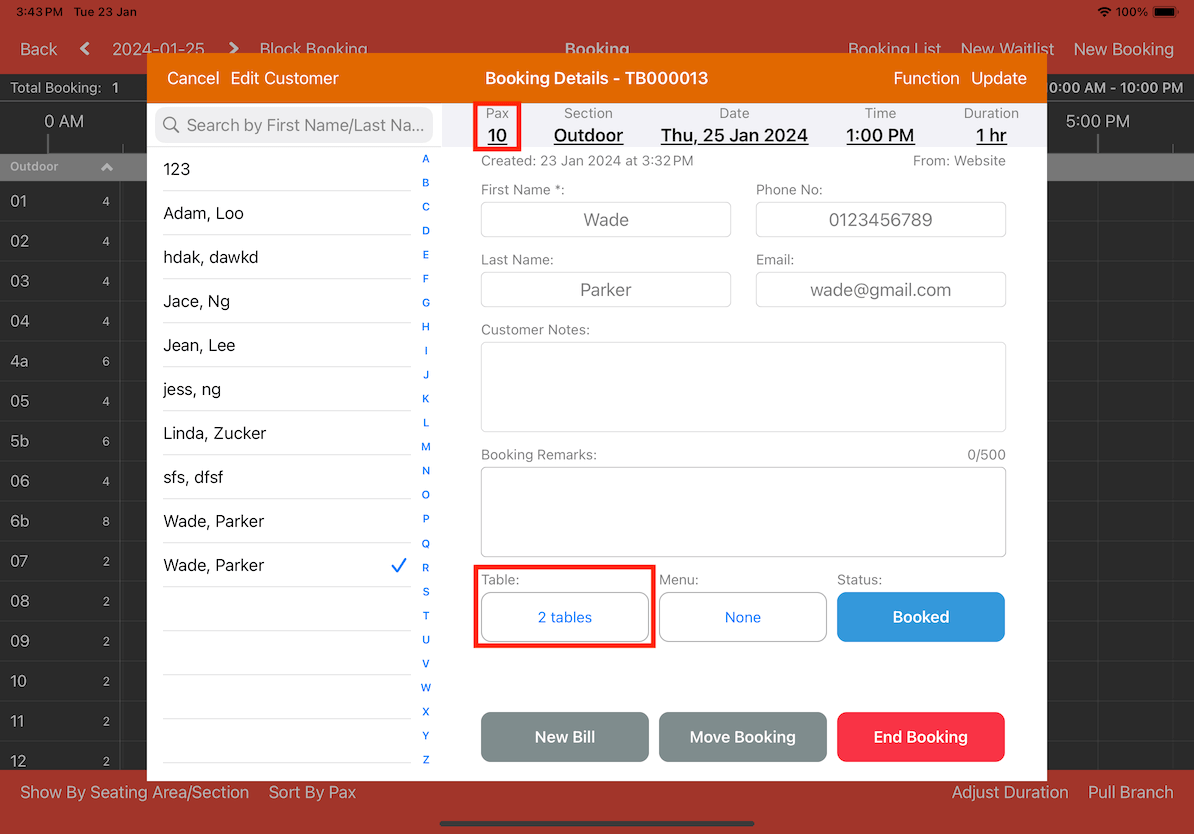
Click on the Table where it indicates 2 tables in the image above, and users will be able to see which specific tables have been selected as shown below.
