Guide | MobiPOS > Cash Register > Bill > Email Receipt
Email Receipt
This guide will explain the steps on how to send out receipt emails.
Begin by clicking on Pay at cash register.
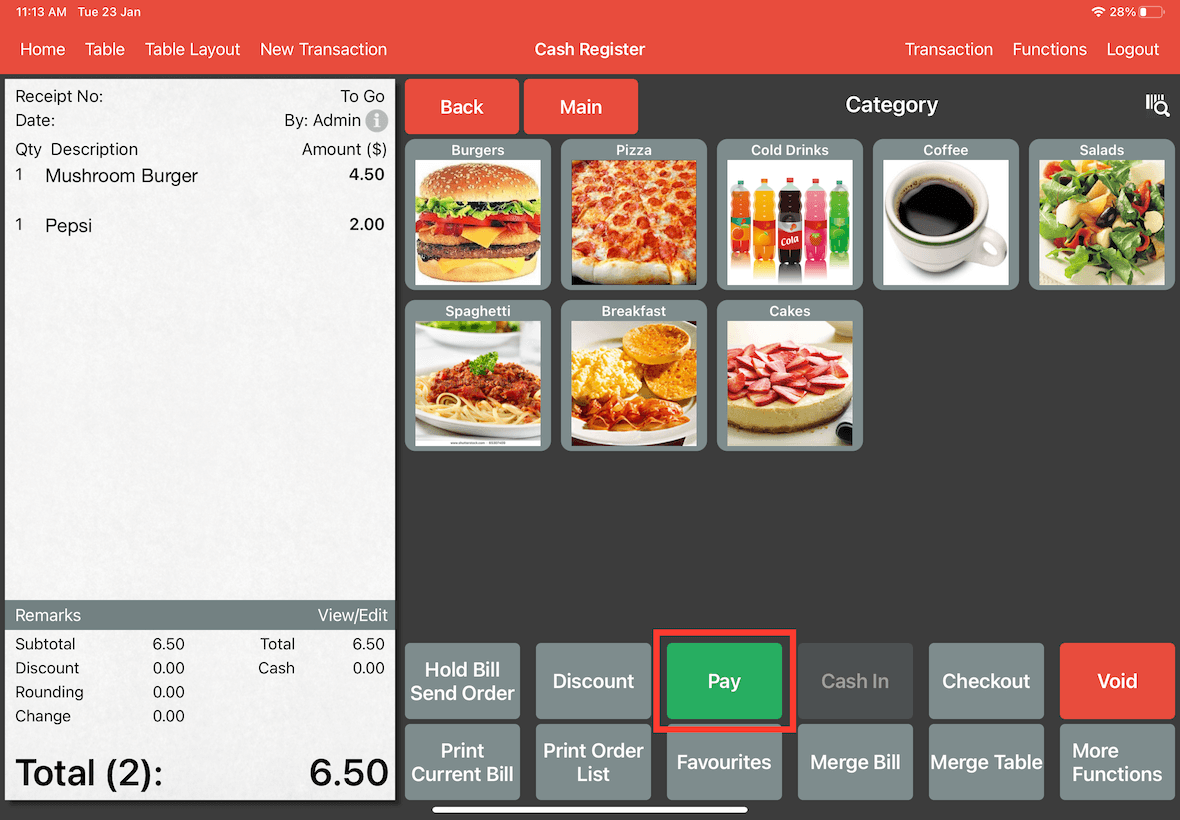
After clicking on Pay, simply enter the payment amount and choose Cash In or select the Exact option.
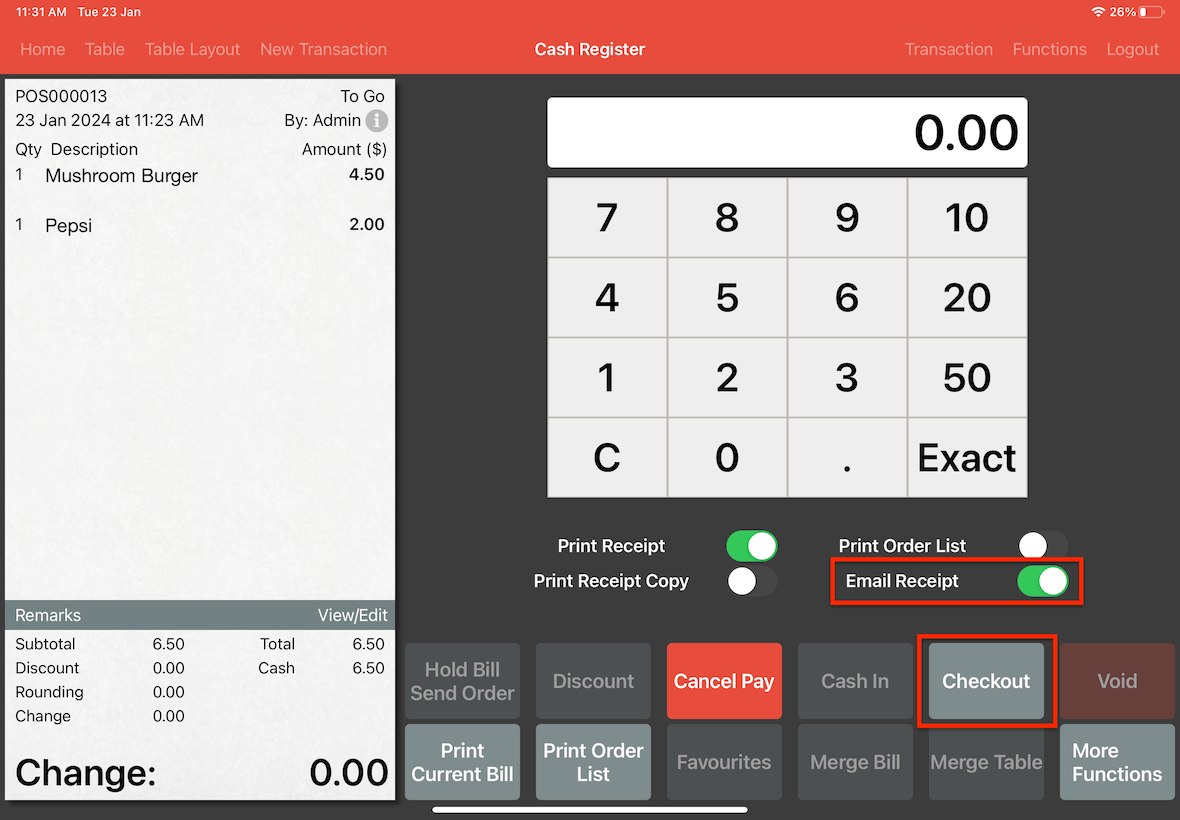
Once the bill has been paid, the option to enable email receipt will appear as seen below. Enable it to email the receipt.
Then, click on Checkout.
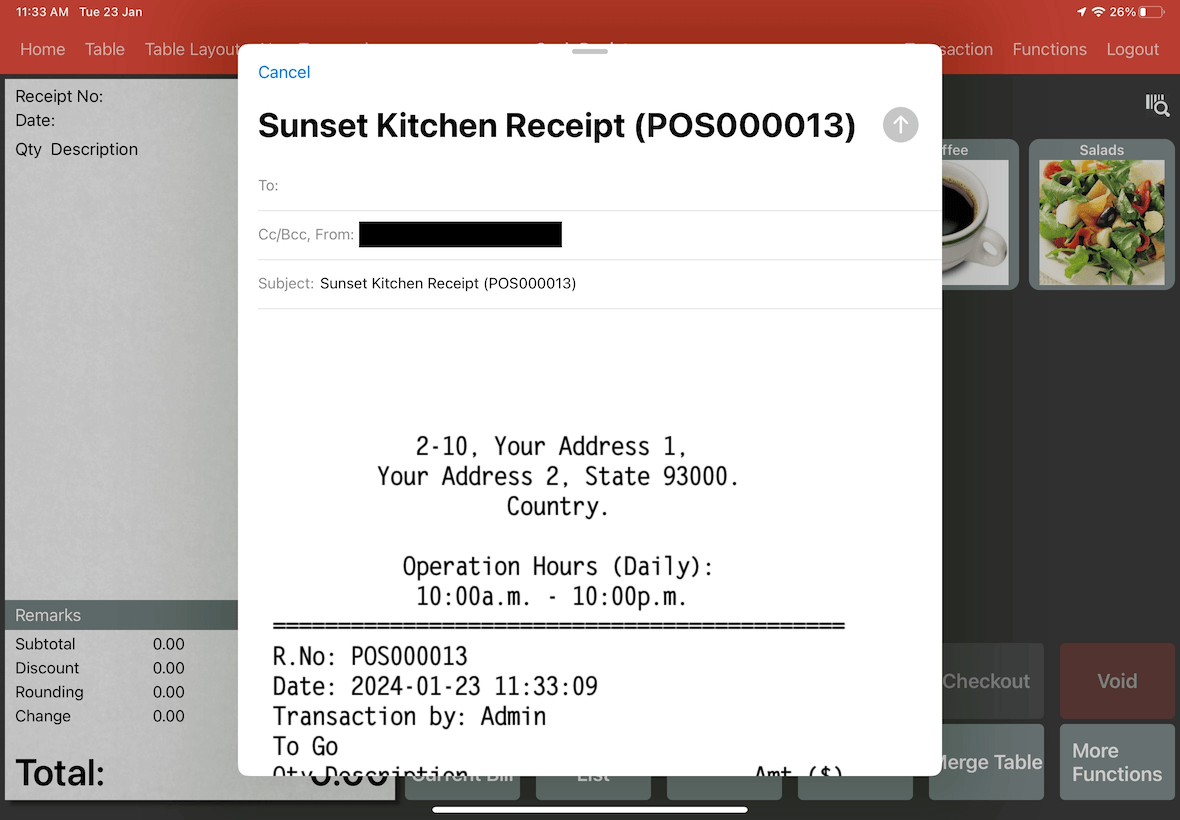
The receipt that will be sent will be displayed.
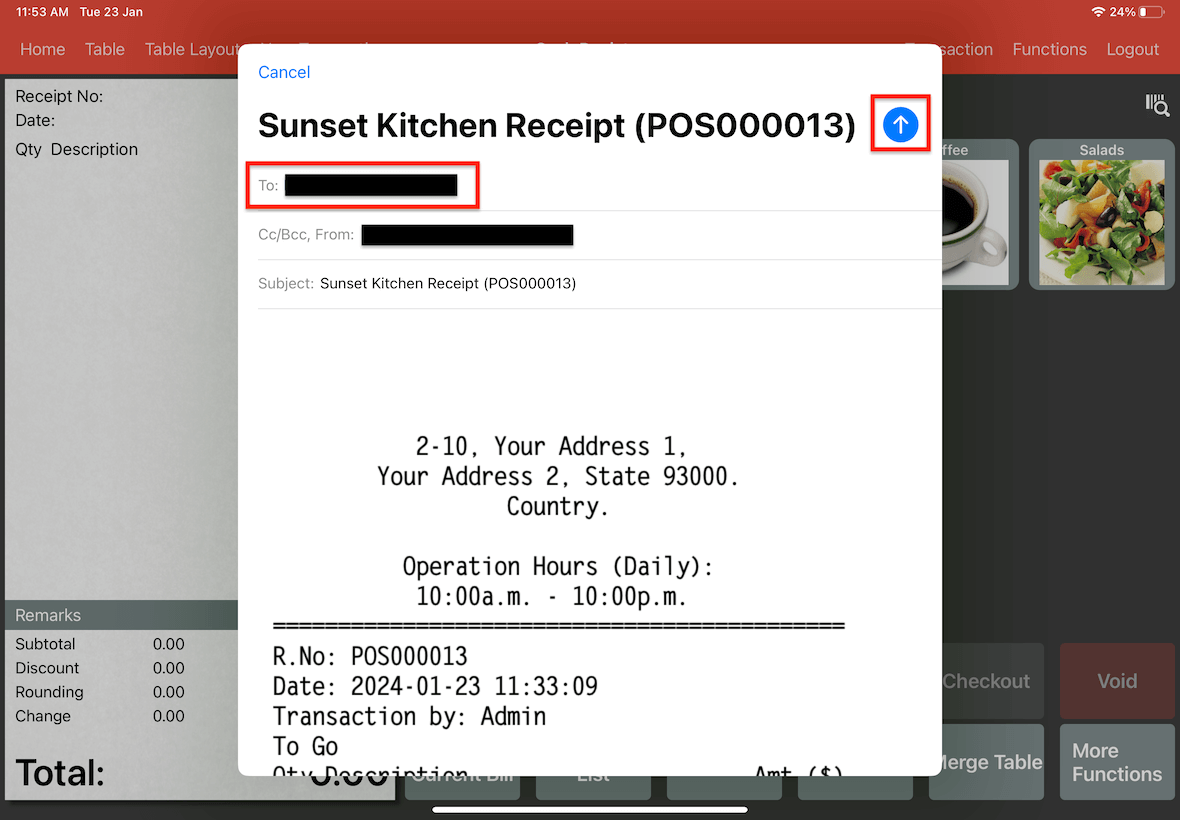
Input the recipient's email address, then click send.
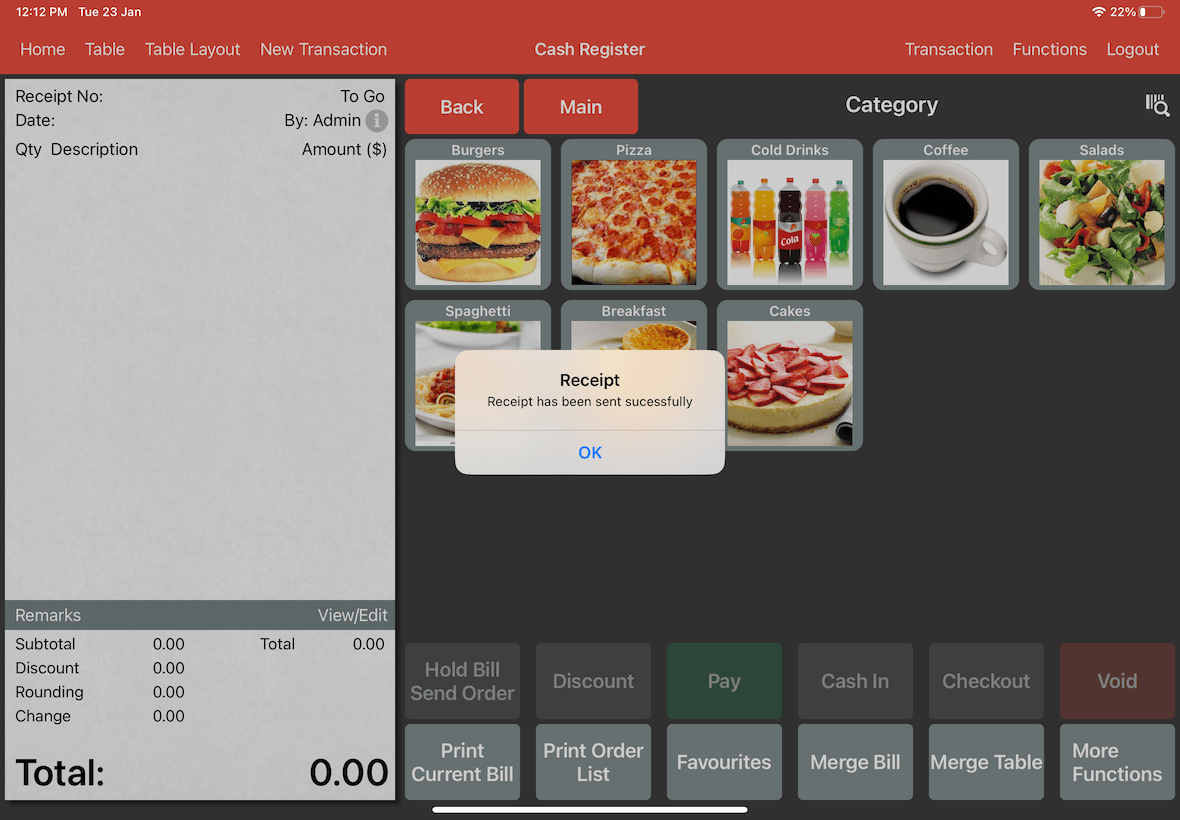
A pop-up will appear with the message "Receipt sent successfully” if it was sent.
Troubleshooting Errors in Sending Receipts
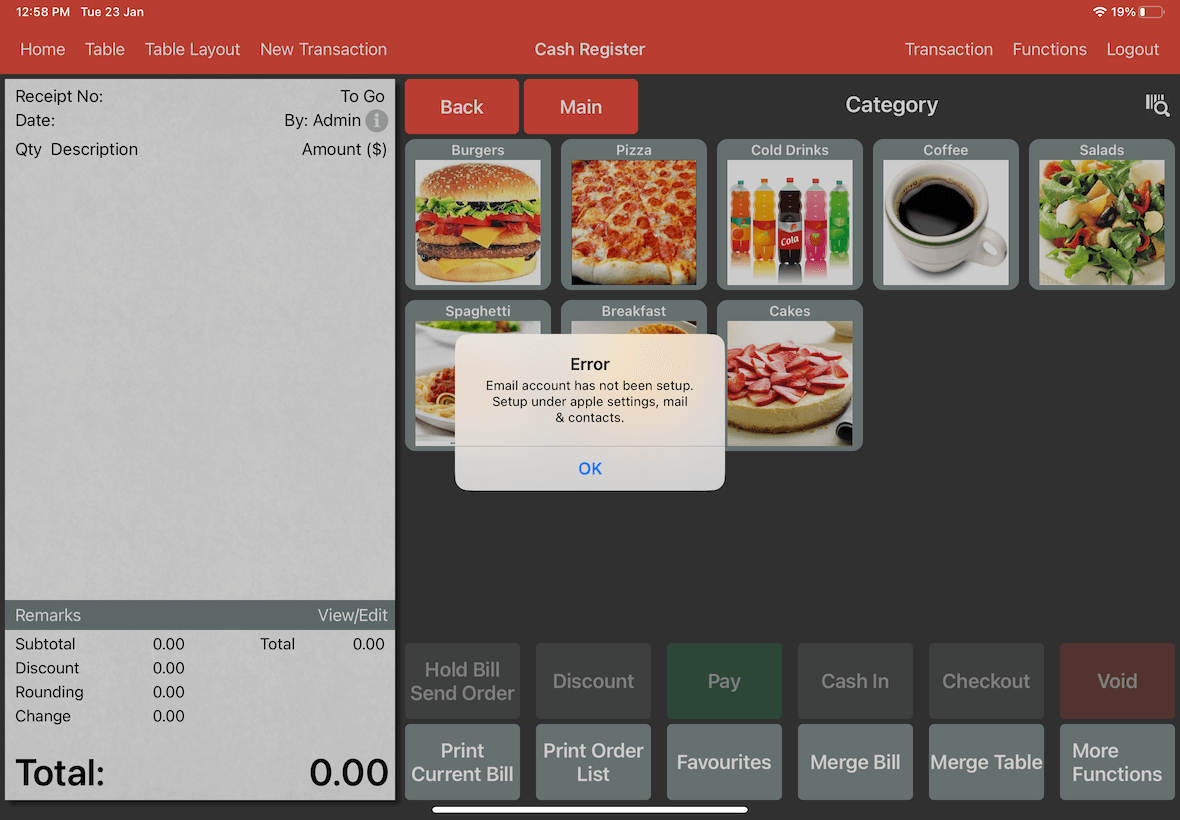
If you encounter an error stating that an email account has not been set up while attempting to email a receipt as seen below, you can resolve the issue by following the following steps.
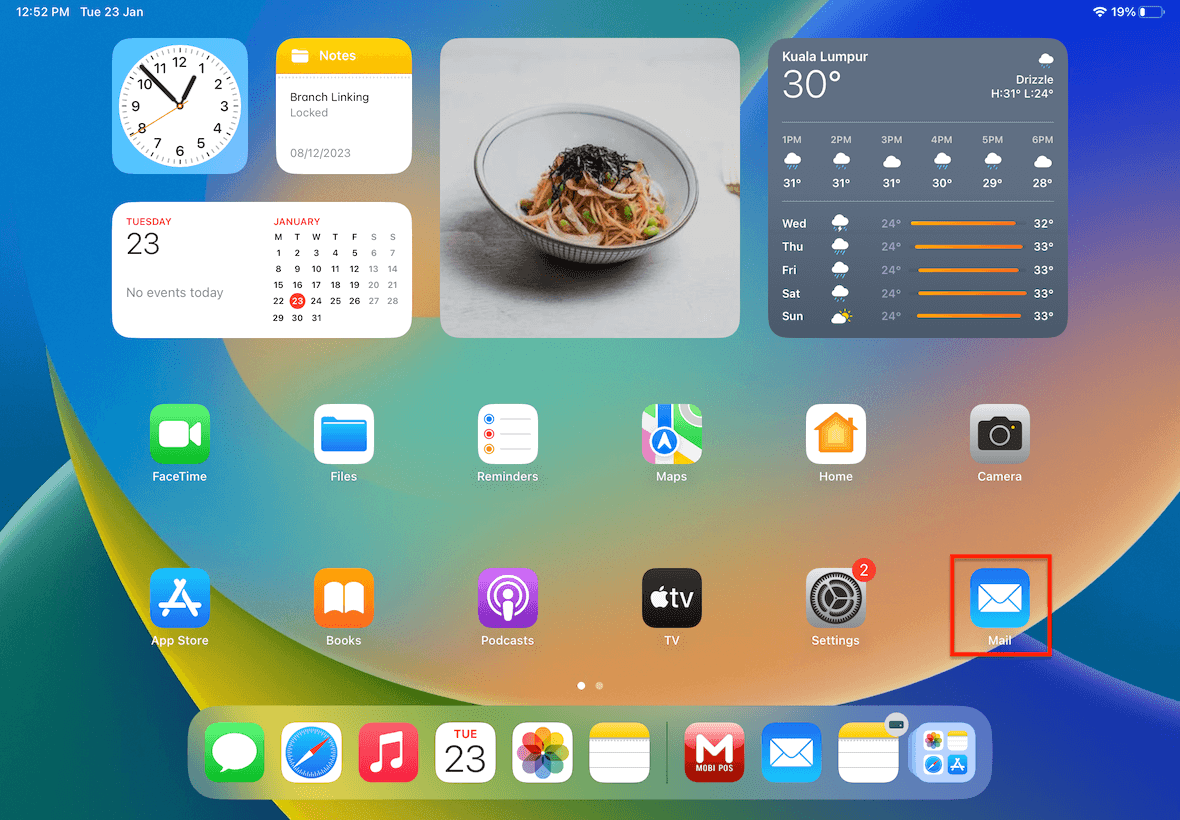
Before you start sending out emails of the receipts, ensure that you have the Mail app downloaded on your device.
Mobi POS will only be able to send emails if you have set up the Mail app.
Getting the Mail App
If you do not have Mail, please download and install the app. To do that, head to App Store on your device.
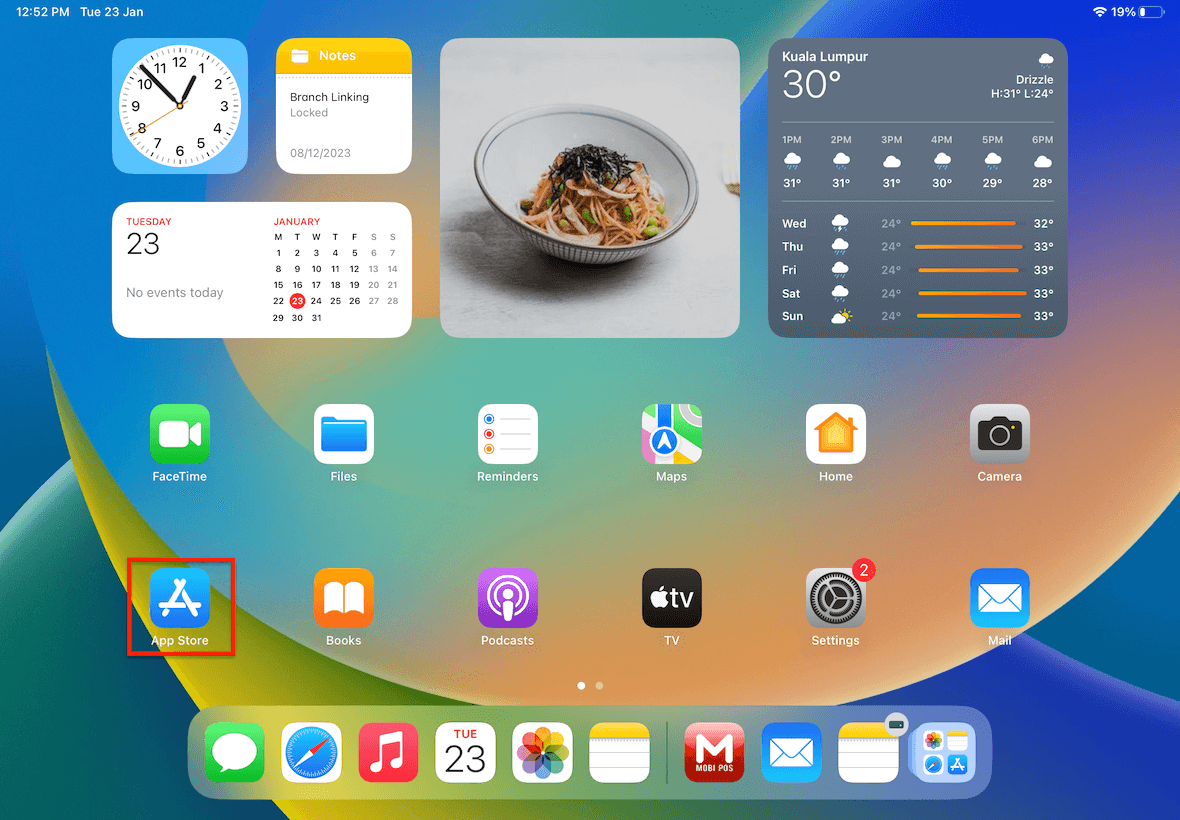
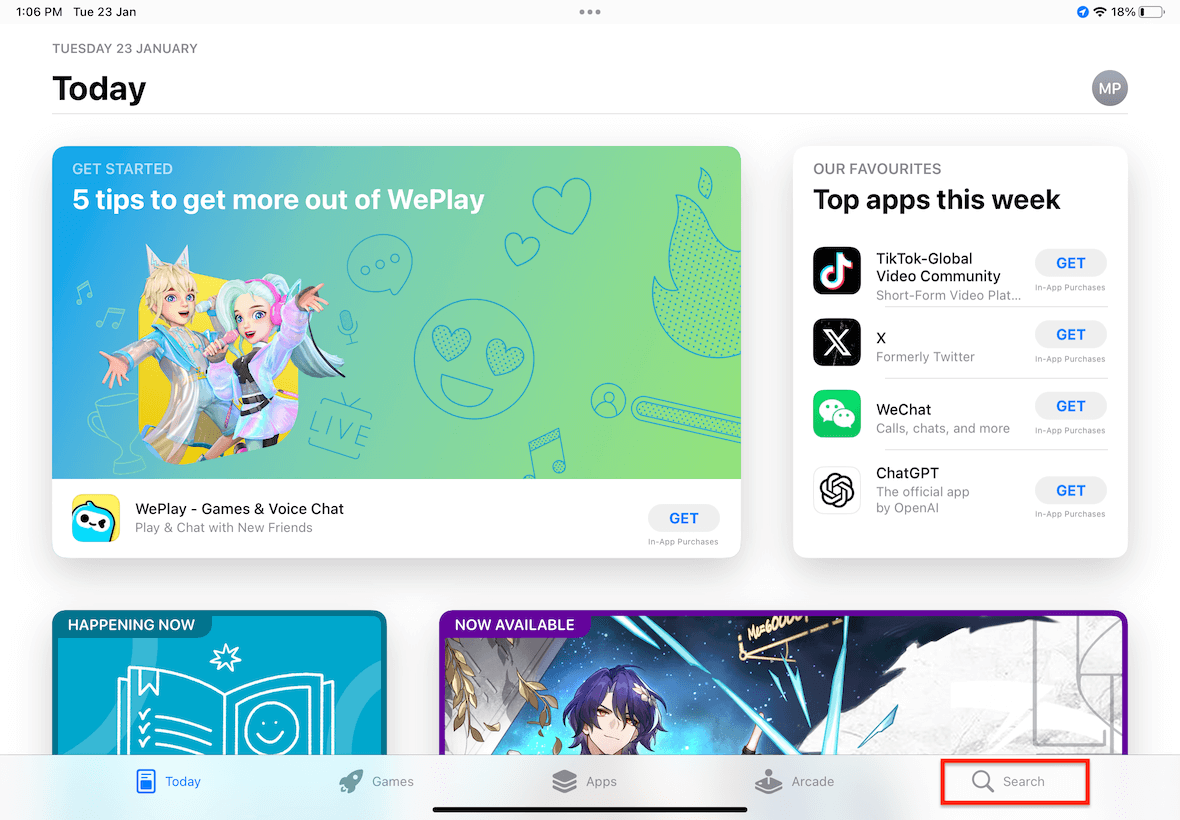
Once you are in the App Store, click on Search.
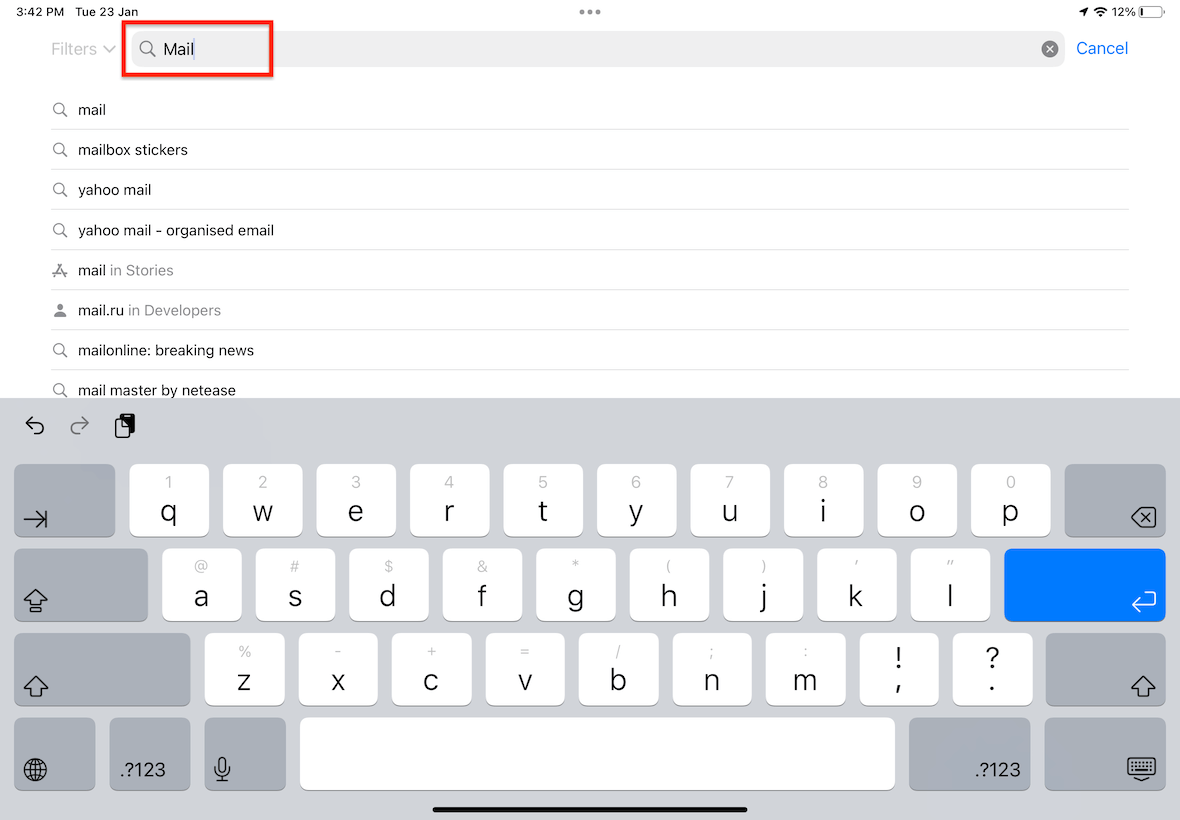
In the search bar, search up “Mail”.
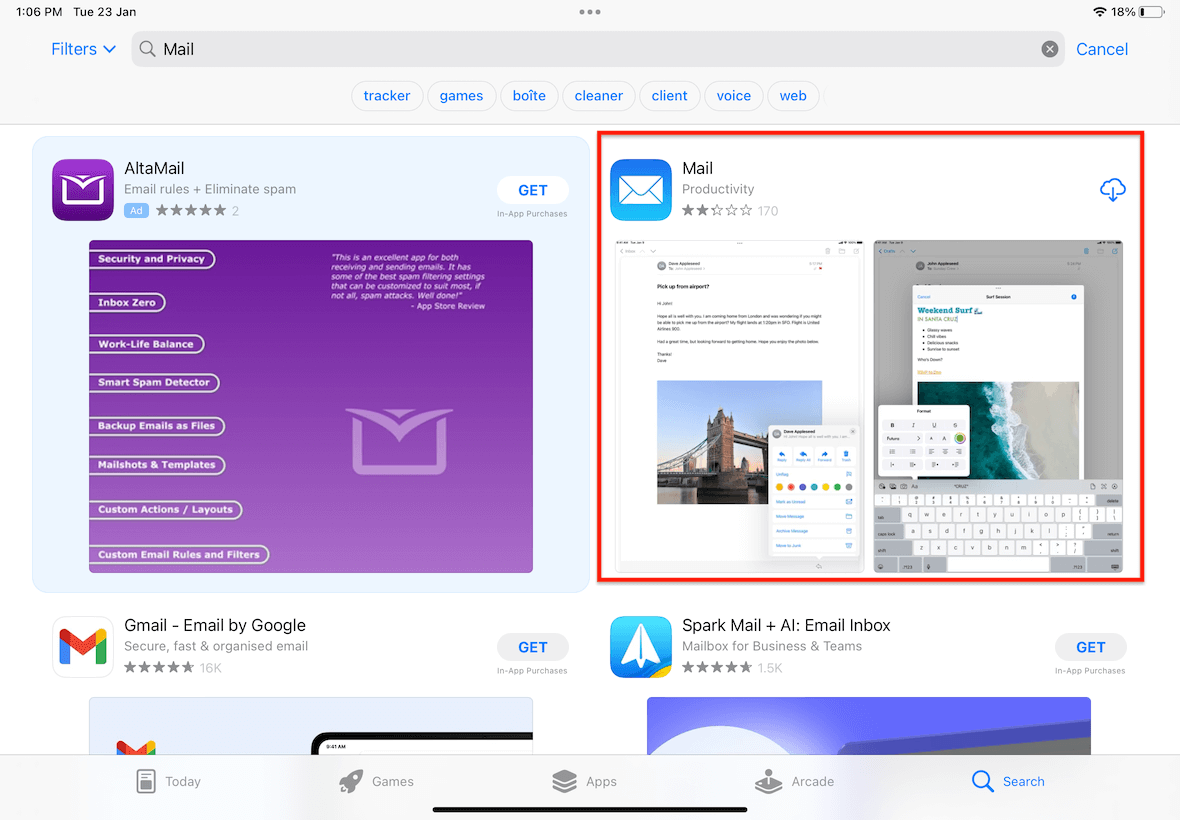
Click on Mail.
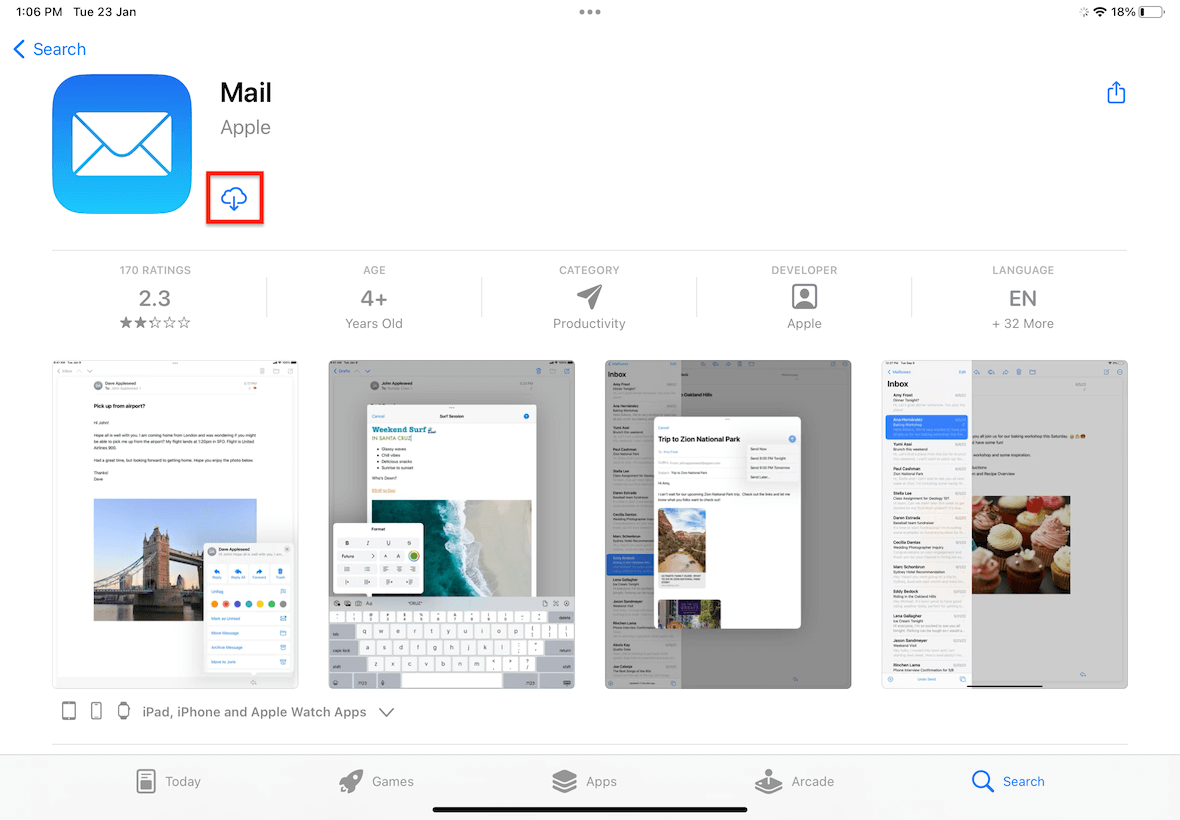
Then, tap on the cloud icon or "GET" to initiate the download.
Setting up Mail
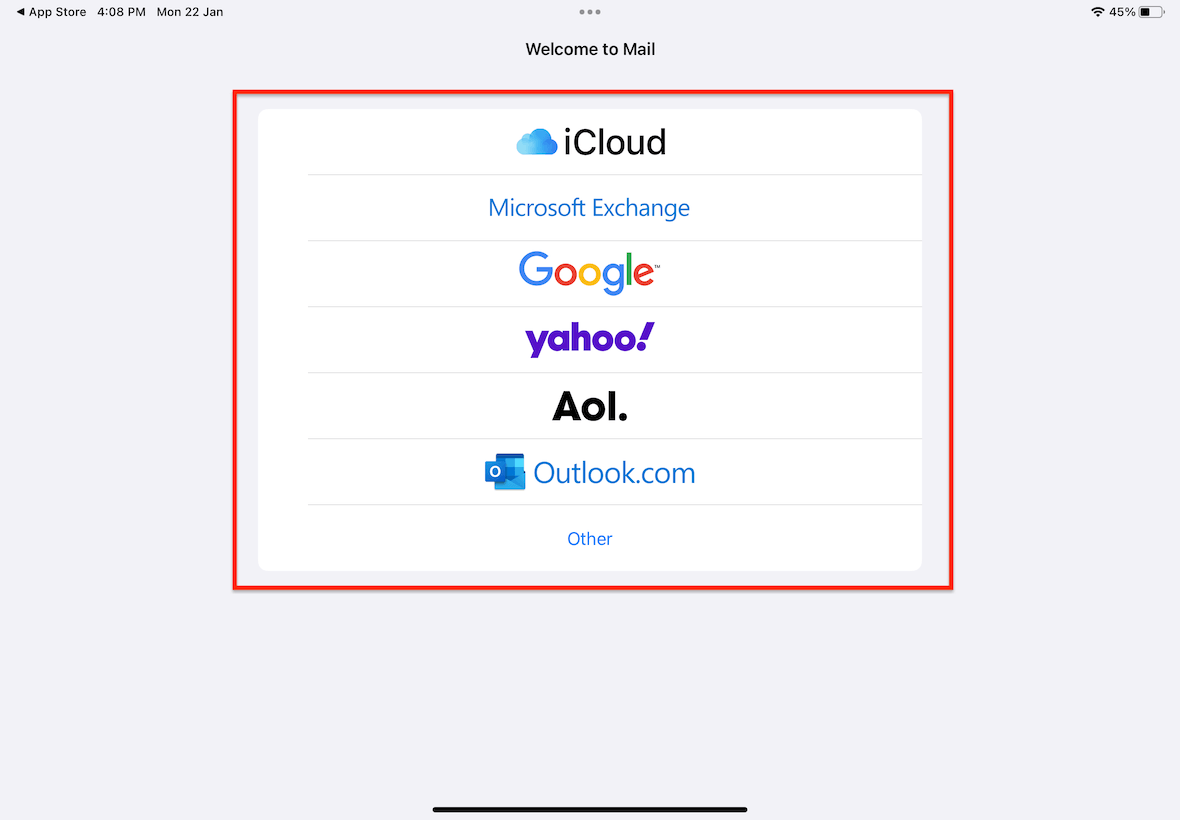
If you have the Mail app installed, ensure that your email account is set up within the app. If it is not set up, you can do so by entering the app, selecting your email provider, and logging in.
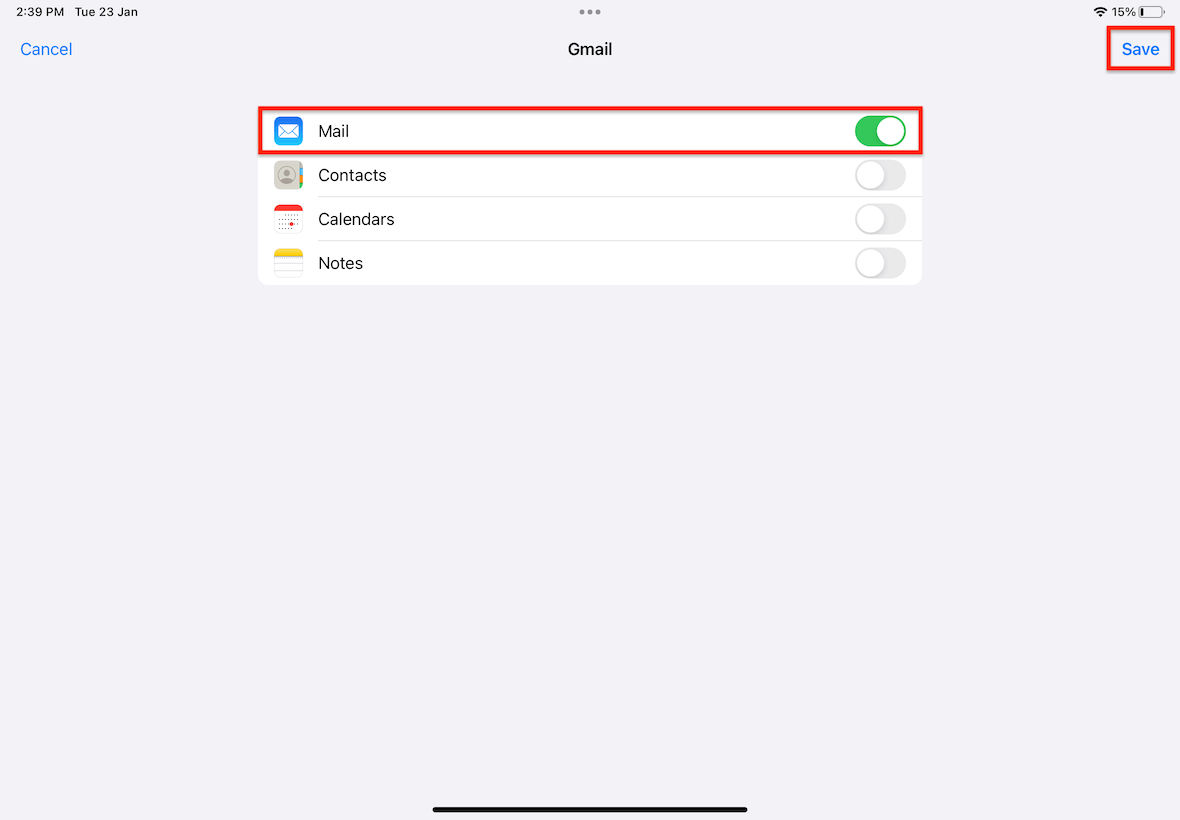
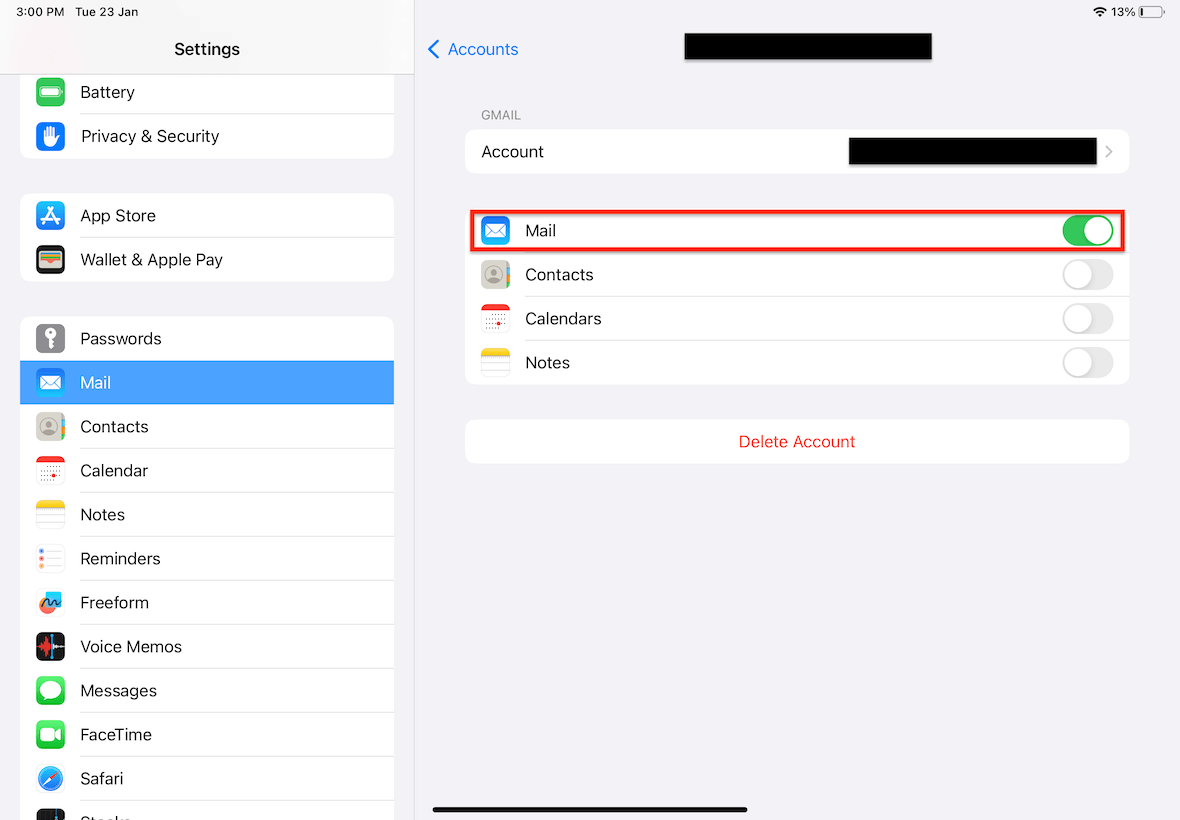
Ensure that Mail is toggled to enable synchronization and click Save.
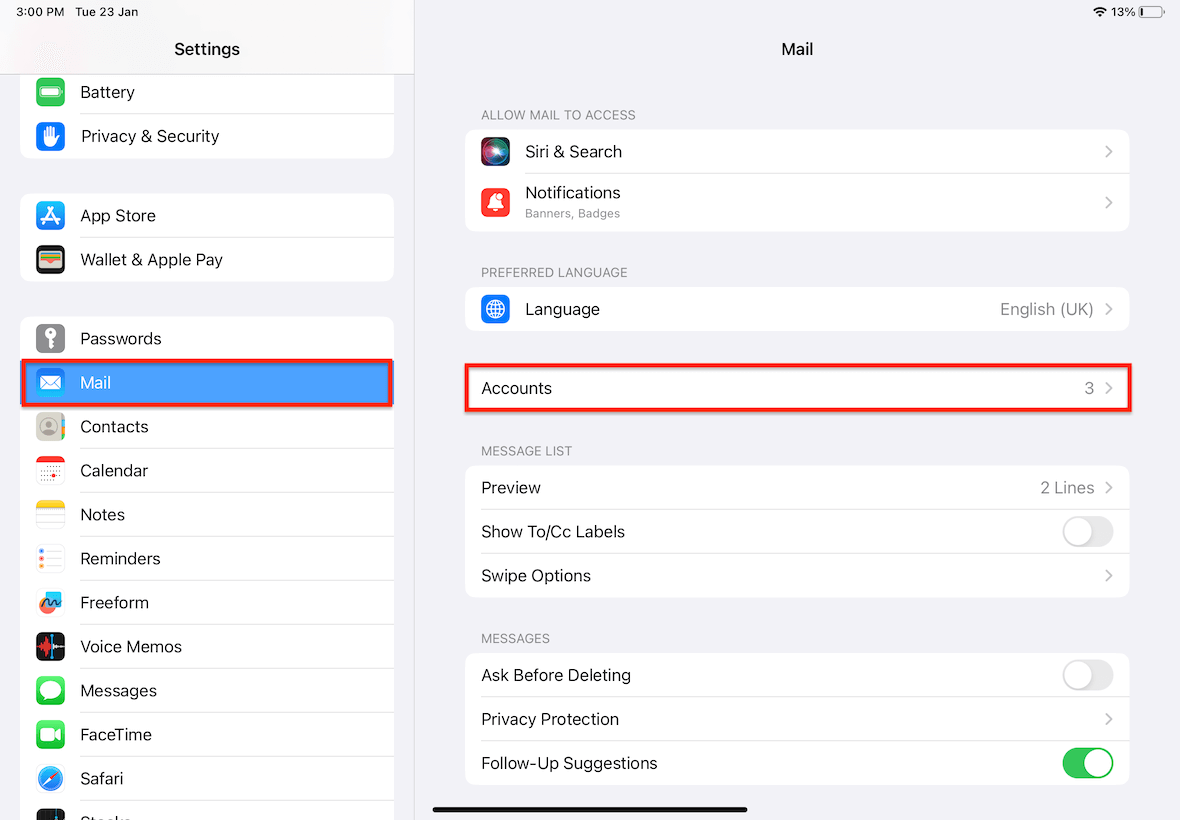
If you forgot to enable it, head into Settings.
Then, click on Mail > Accounts.
Click on the email account you are using to send out receipts.
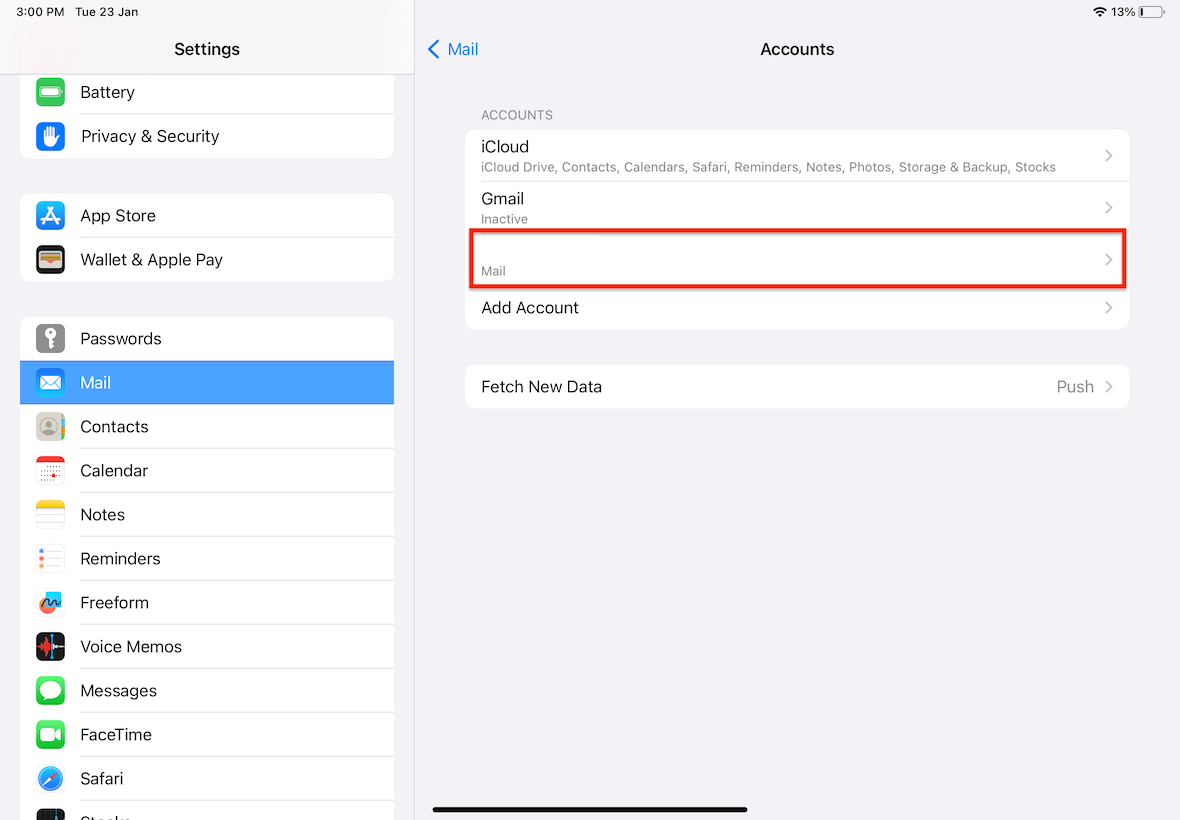
Toggle the "Mail" option.
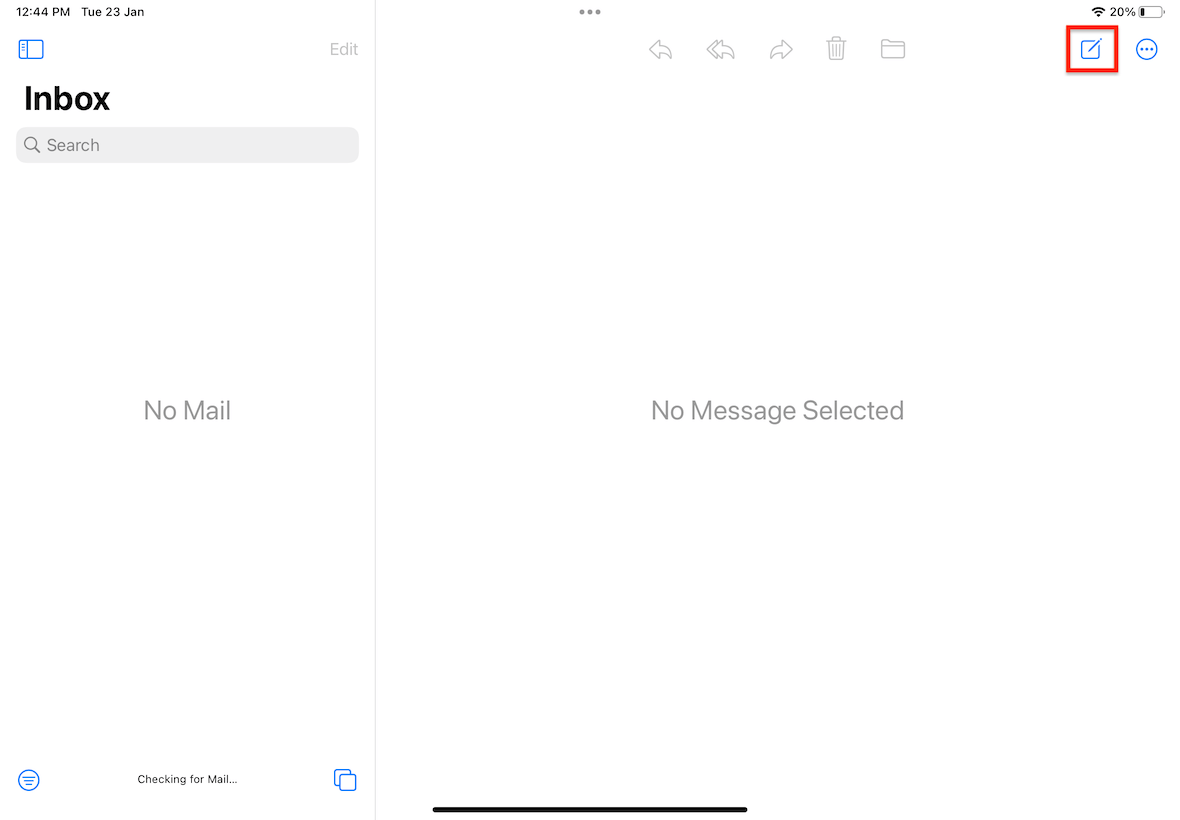
If you are still facing the issue of sending out emails, send out a test email and check if it can be successfully delivered.
To do that, in the mail app, click on the new mail button at the top right corner.
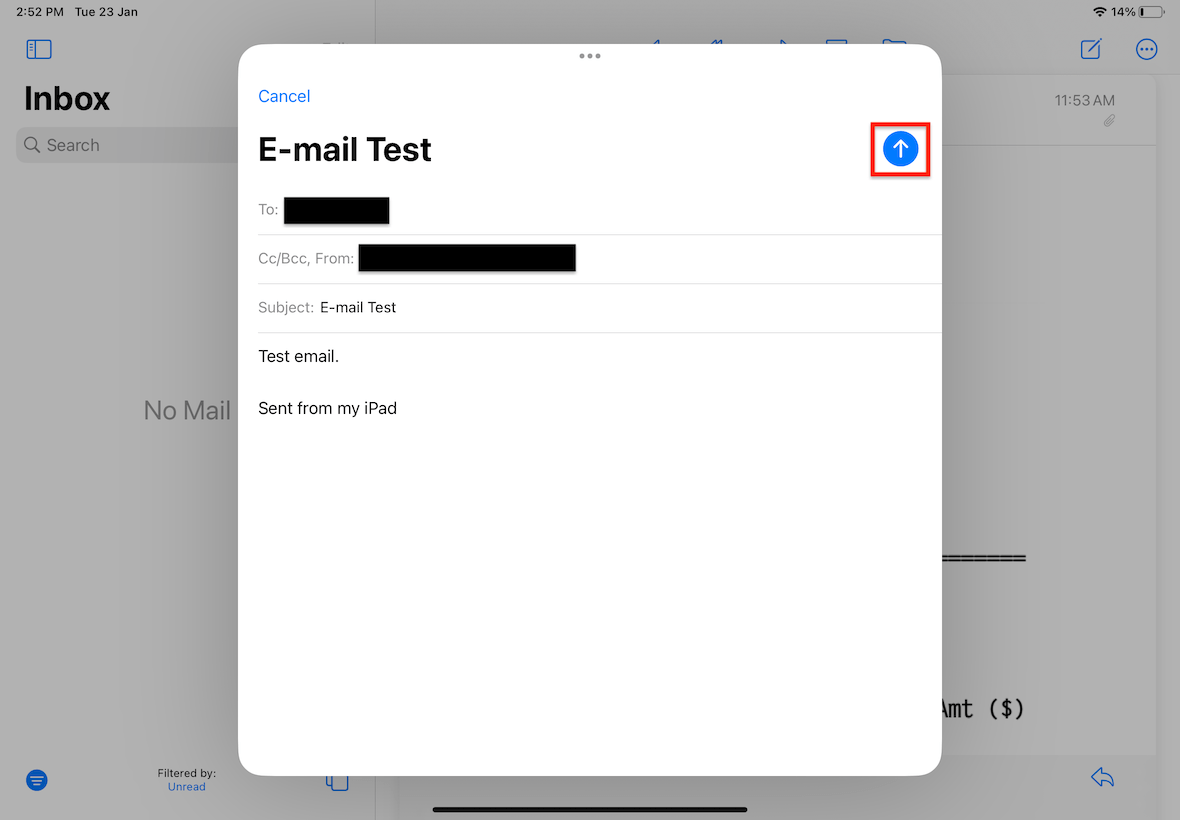
Compose a test email and send it. If it is able to be sent, your receipts will be able to be sent aswell.
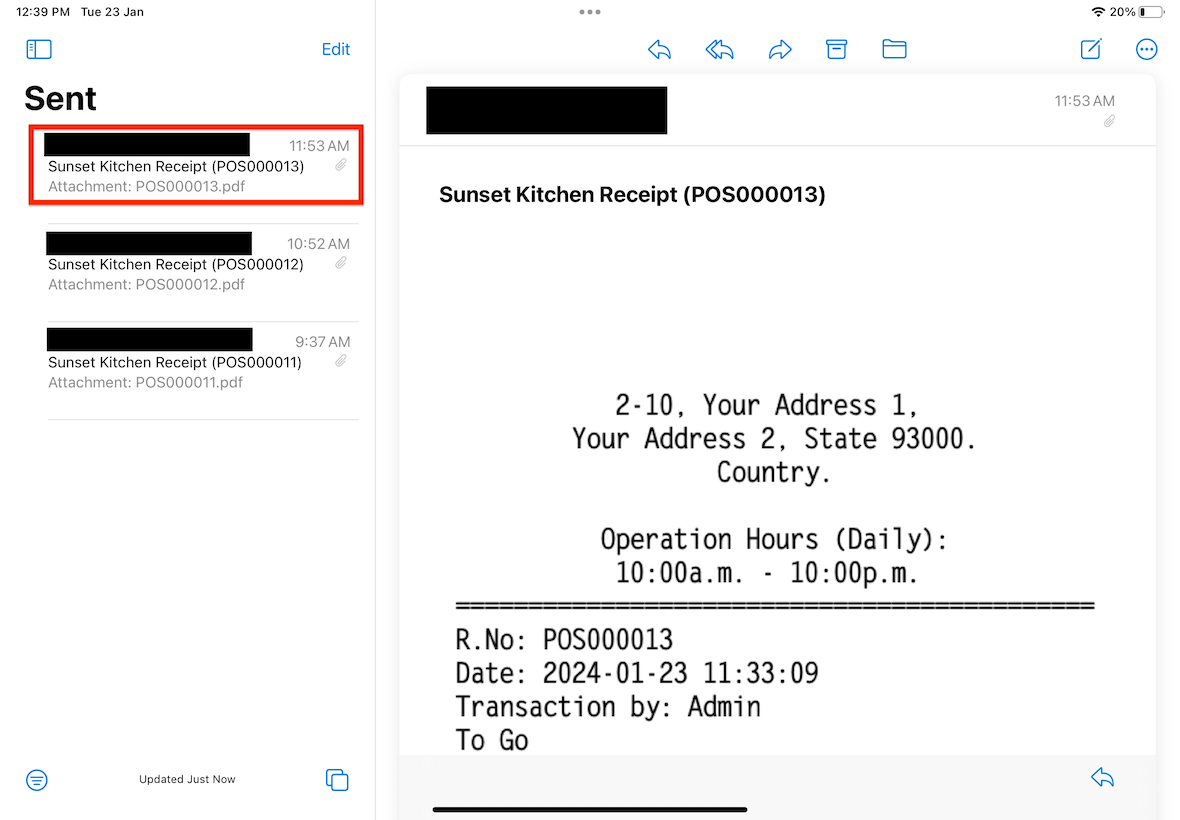
If all steps are completed successfully, you will be able to send and view your sent email, as depicted below.
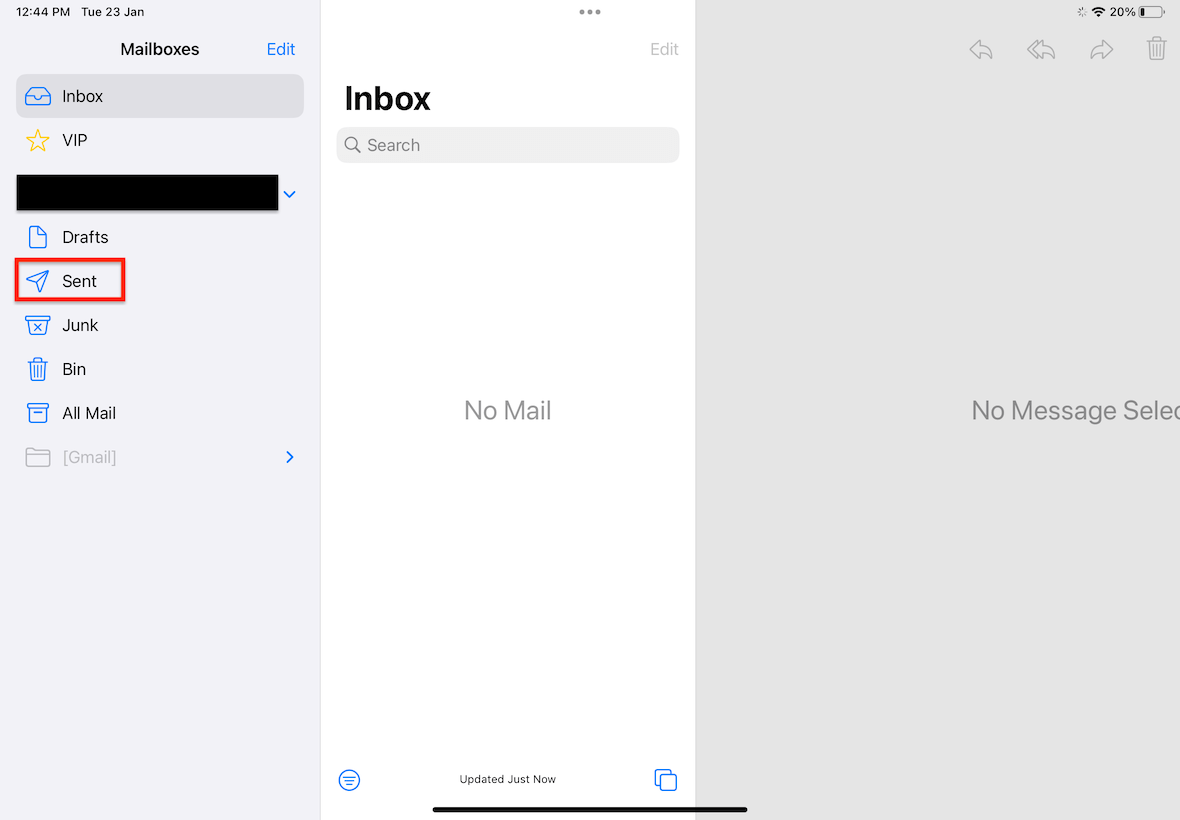
In the Mail app, click on the button at the top-left corner.
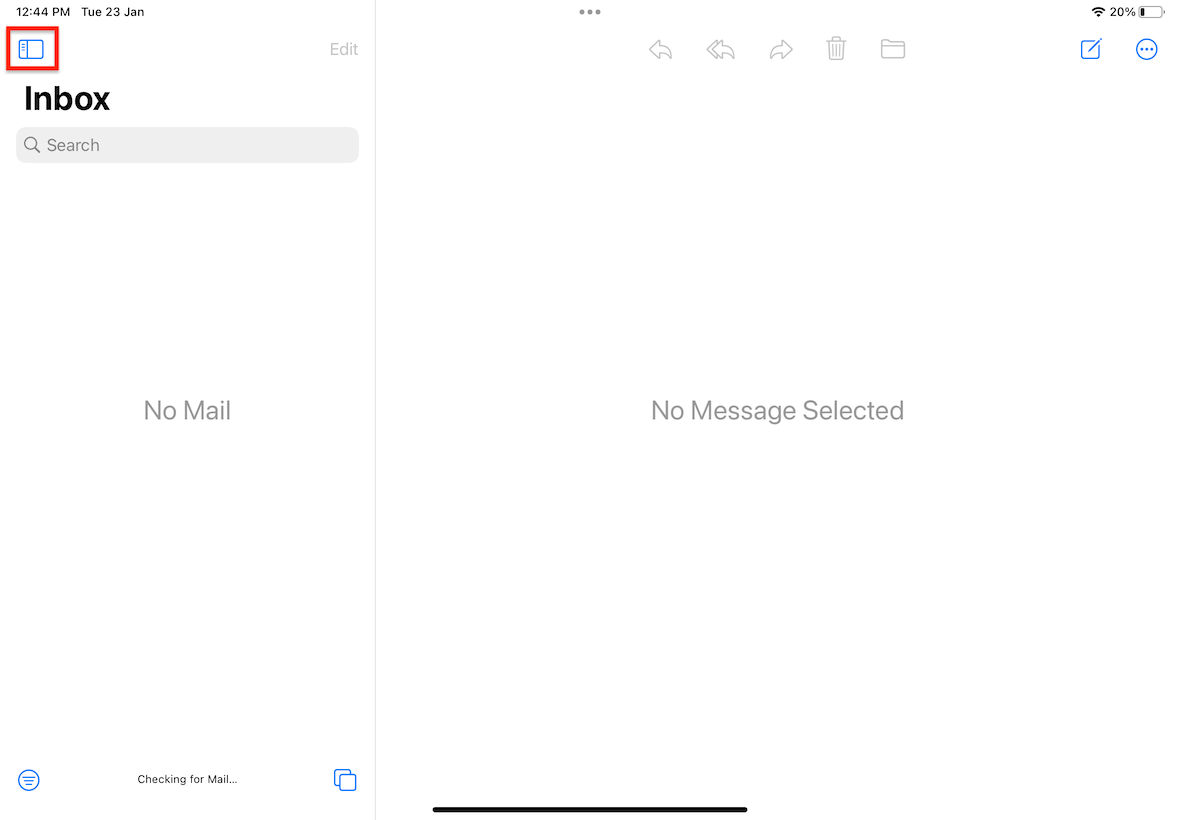
Click on Sent.
It will show all the receipts you have sent. The example below shows the receipt that was sent earlier.
If there is still an error sending out your receipt emails, please resolve the issue according to the guidelines or instructions from the Mail app.